On watchmaking
I've been working to build out Ghost Watch & Tool as a side business building mechanical watches. While I'm a long ways from actually turning it into a viable business, I've been spending time building watches and learning how to repair them. As of this post, I've built about a dozen of them. I've come to really enjoy the process and thought I'd write it up.
How it started
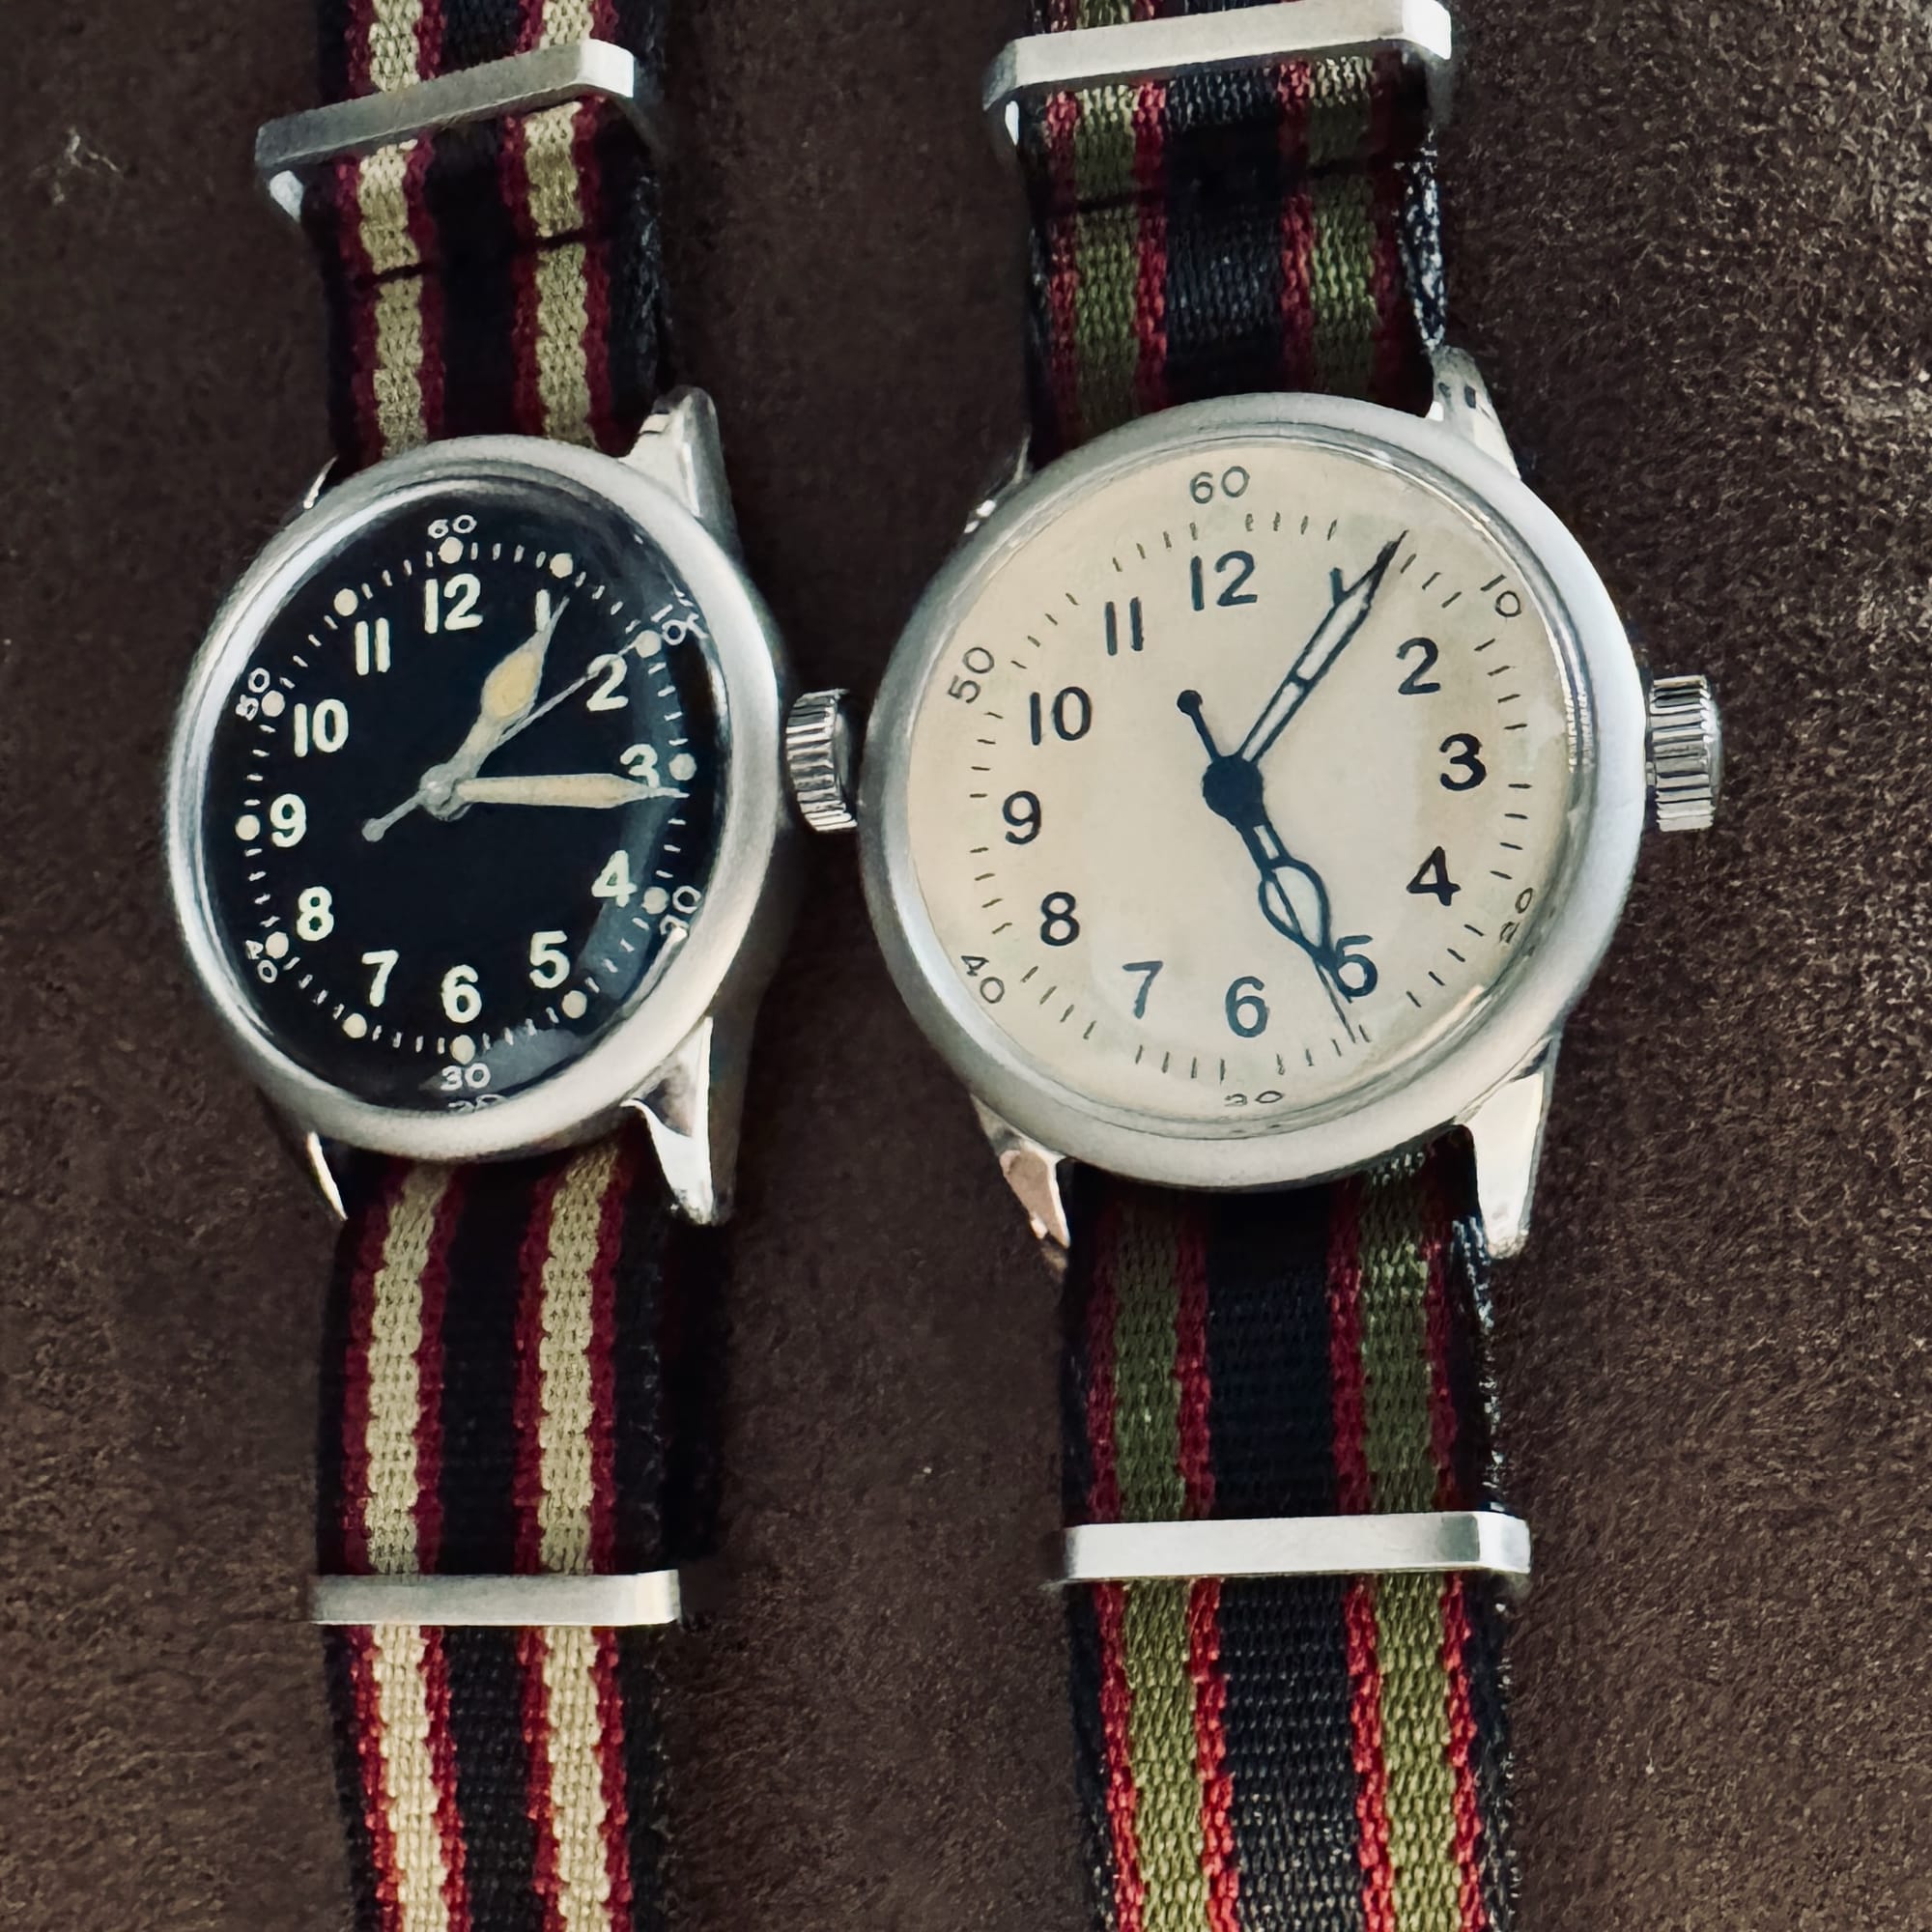
In February of 2007, I deployed to Iraq as a PSYOP Specialist. I bought the first watch I can remember in the PX there, a $25 analog field watch. I would later pick up a Casio Pathfinder on that deployment, but the field watch has long had a special place in my heart.


Fast forward a decade and a half later, and several Timex Expedition quartz watches, attempts at using an Apple Watch, and a Garmin Instinct, and I bought my first nice watches: a Bulova Lunar Pilot and a Shinola Runwell. They were still a quartz watches, but the process of buying got me to start looking at mechanical watches. They called to me with a siren song: mechanical, no batteries, somewhat of a relic of a lost era. I ended up picking up a pair of Praesidium A11 replicas—replicas of the service watches made for the U.S. military in World War II.
During this same time, I'd gotten into tech (hey you, learn to code etc). While the work has been enjoyable at times, staring at a computer screen isn't how I'd like to spend my time anymore, and I've come to particularly value analog skills. With that in mind, I bought a tool kit and some basic kits, starting with a Miyota (Citizen) aviator's watch and a Seiko NH34 GMT watch.
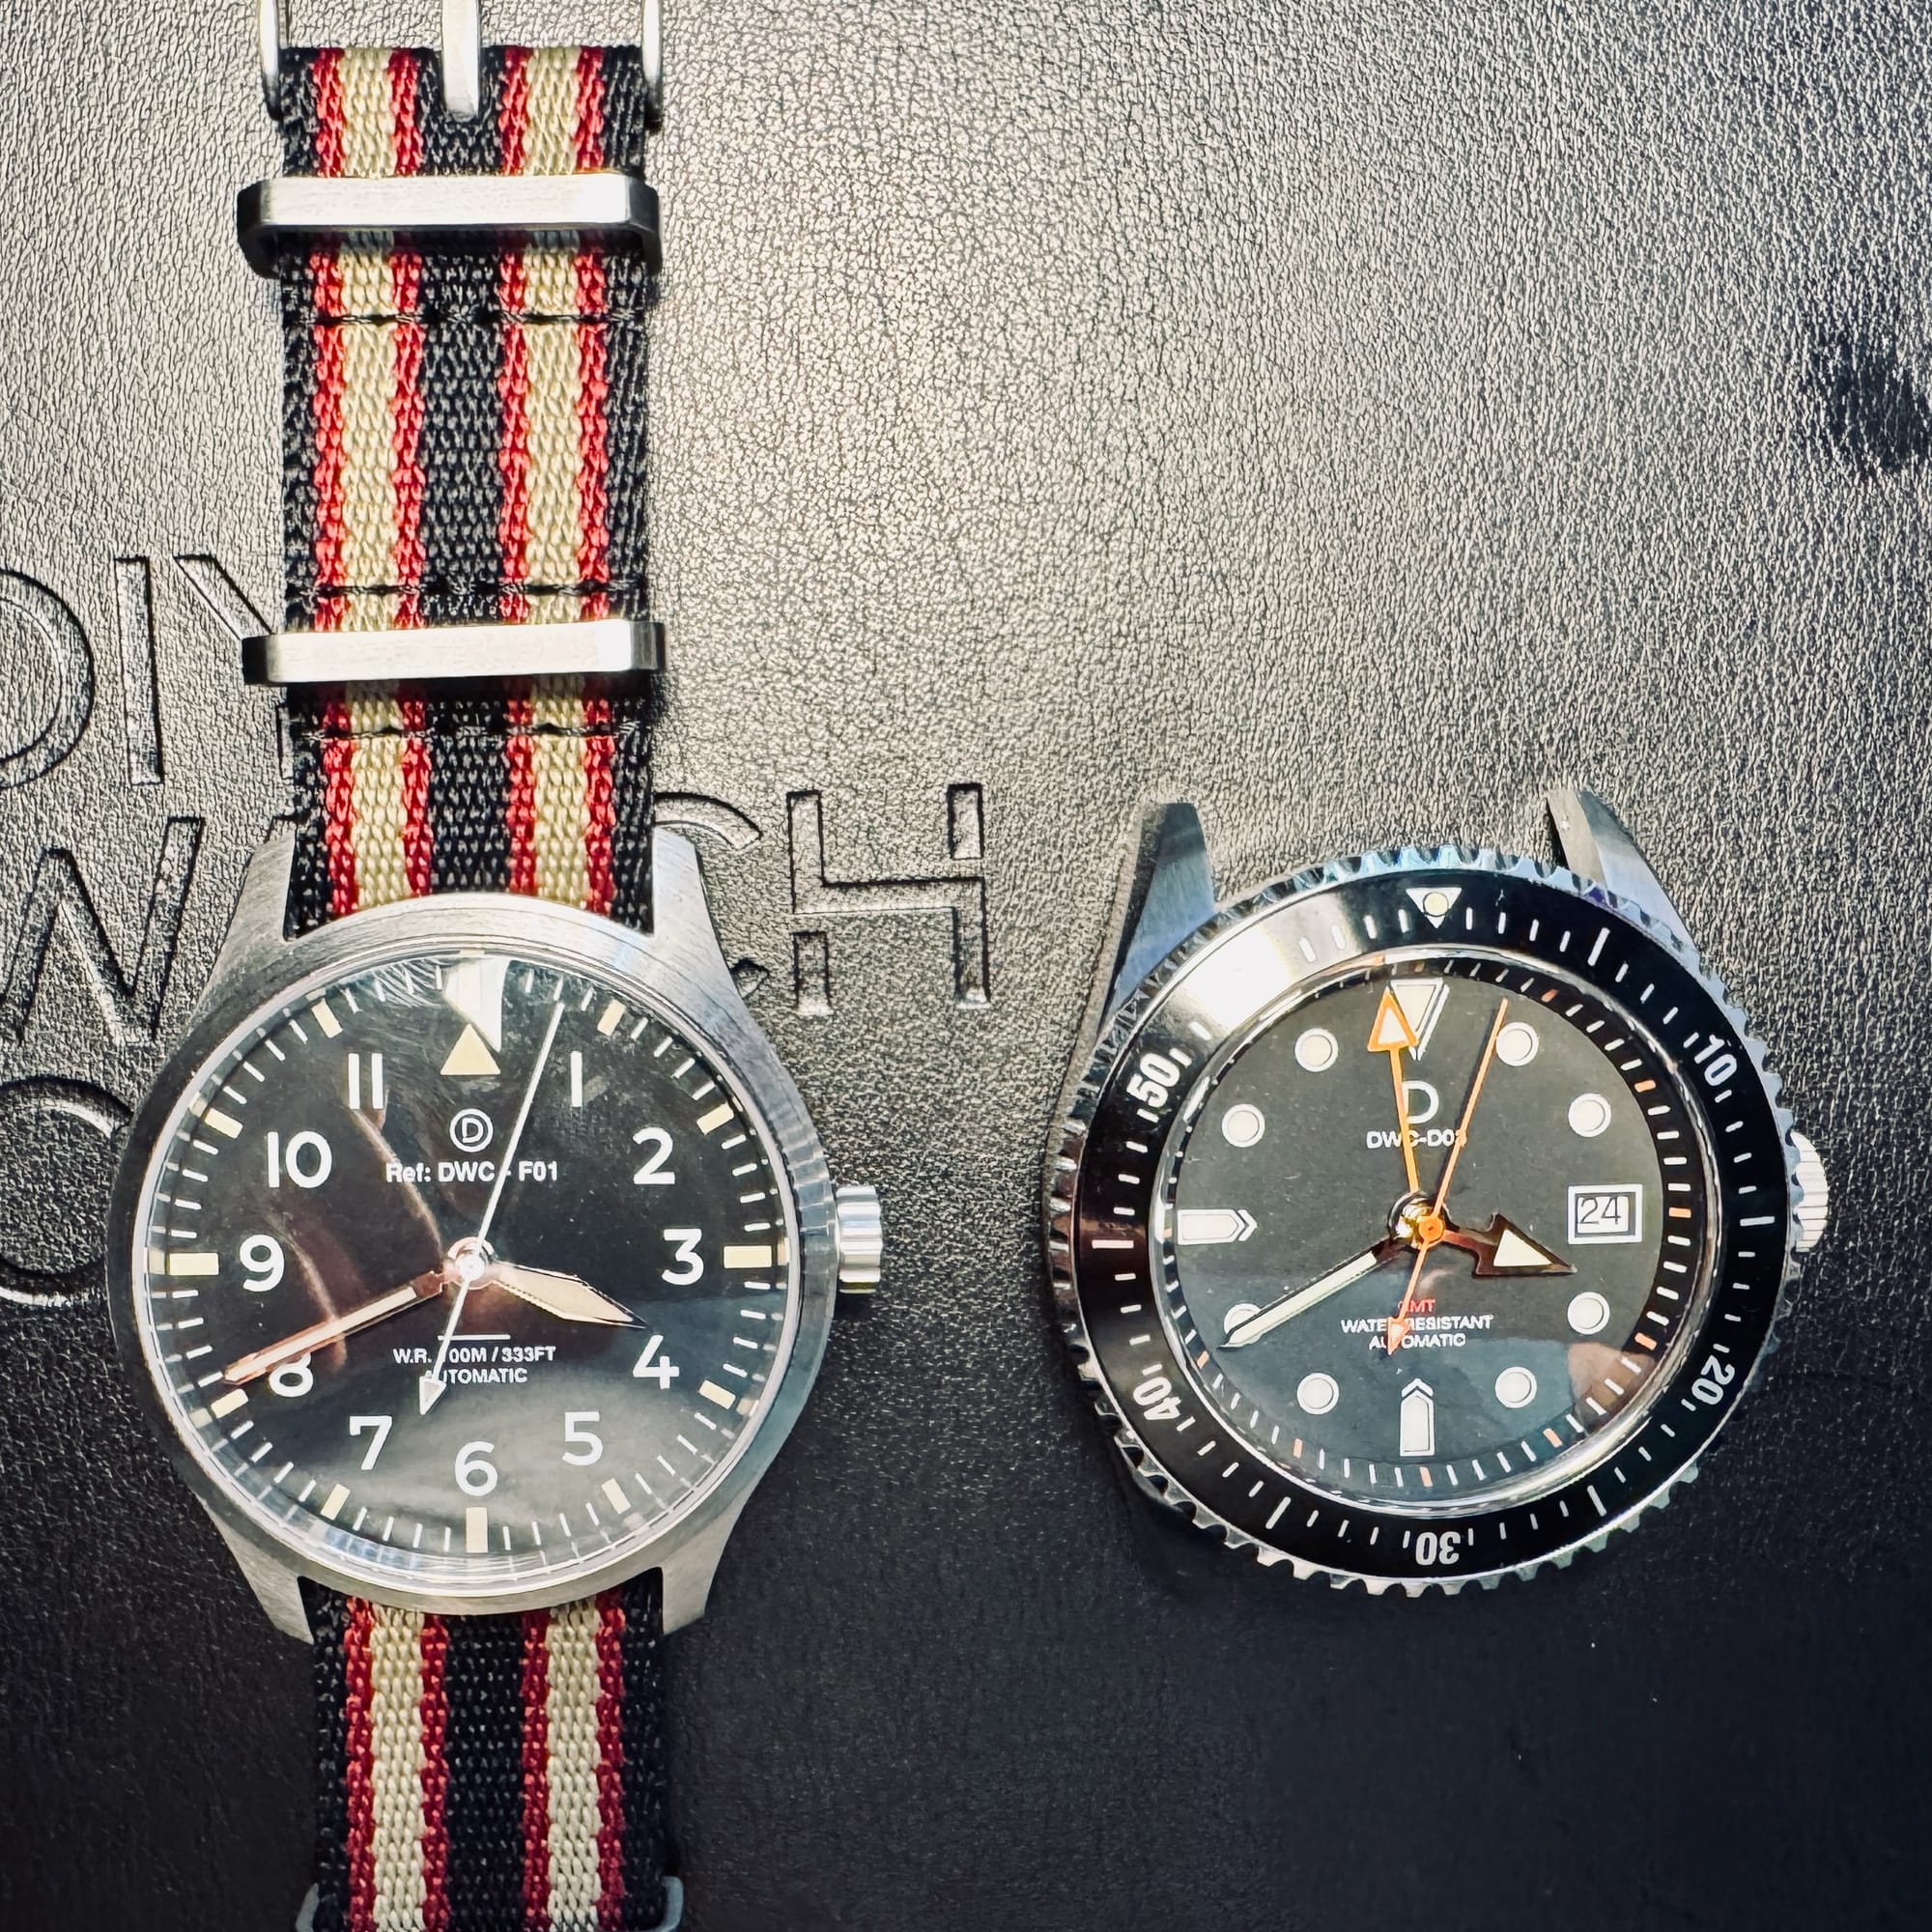
I experimented with making Swiss watches next courtesy of a watch parts and repair store near me. Of course, in watches, the Swiss are probably the best known and make incredible movements (the movement is the heart of the watch).

On watchmaking
When building a watch, you've got to assemble the parts, your tools, then get into it.
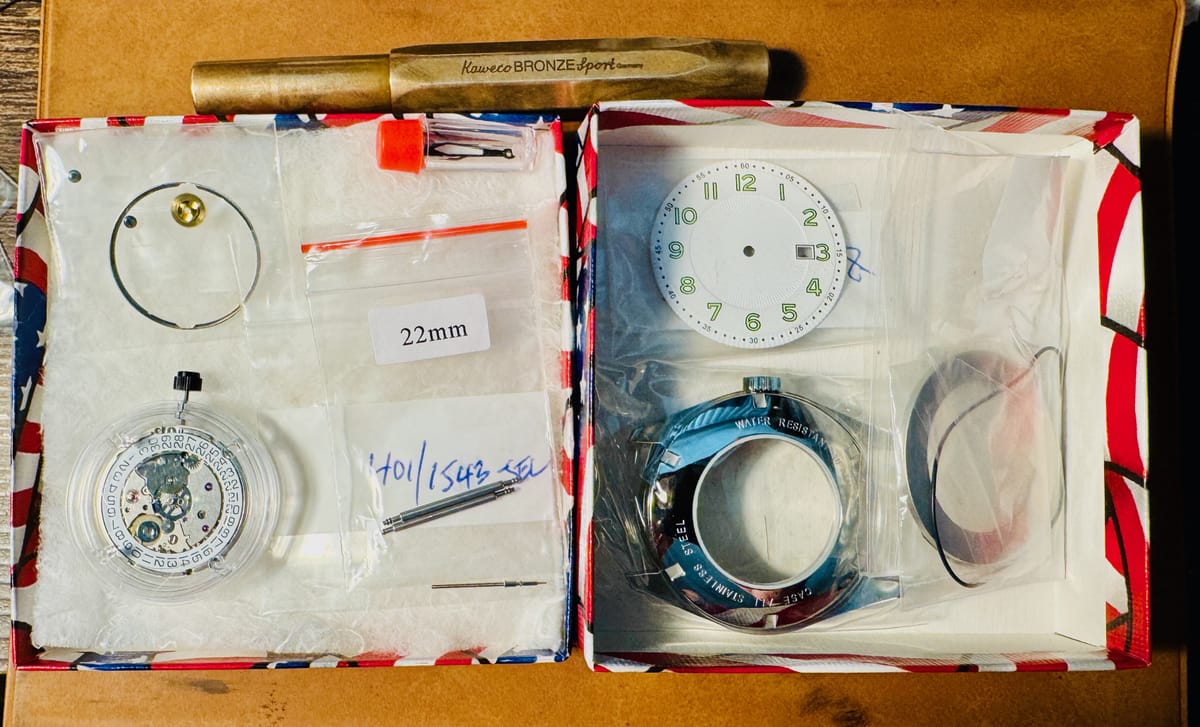
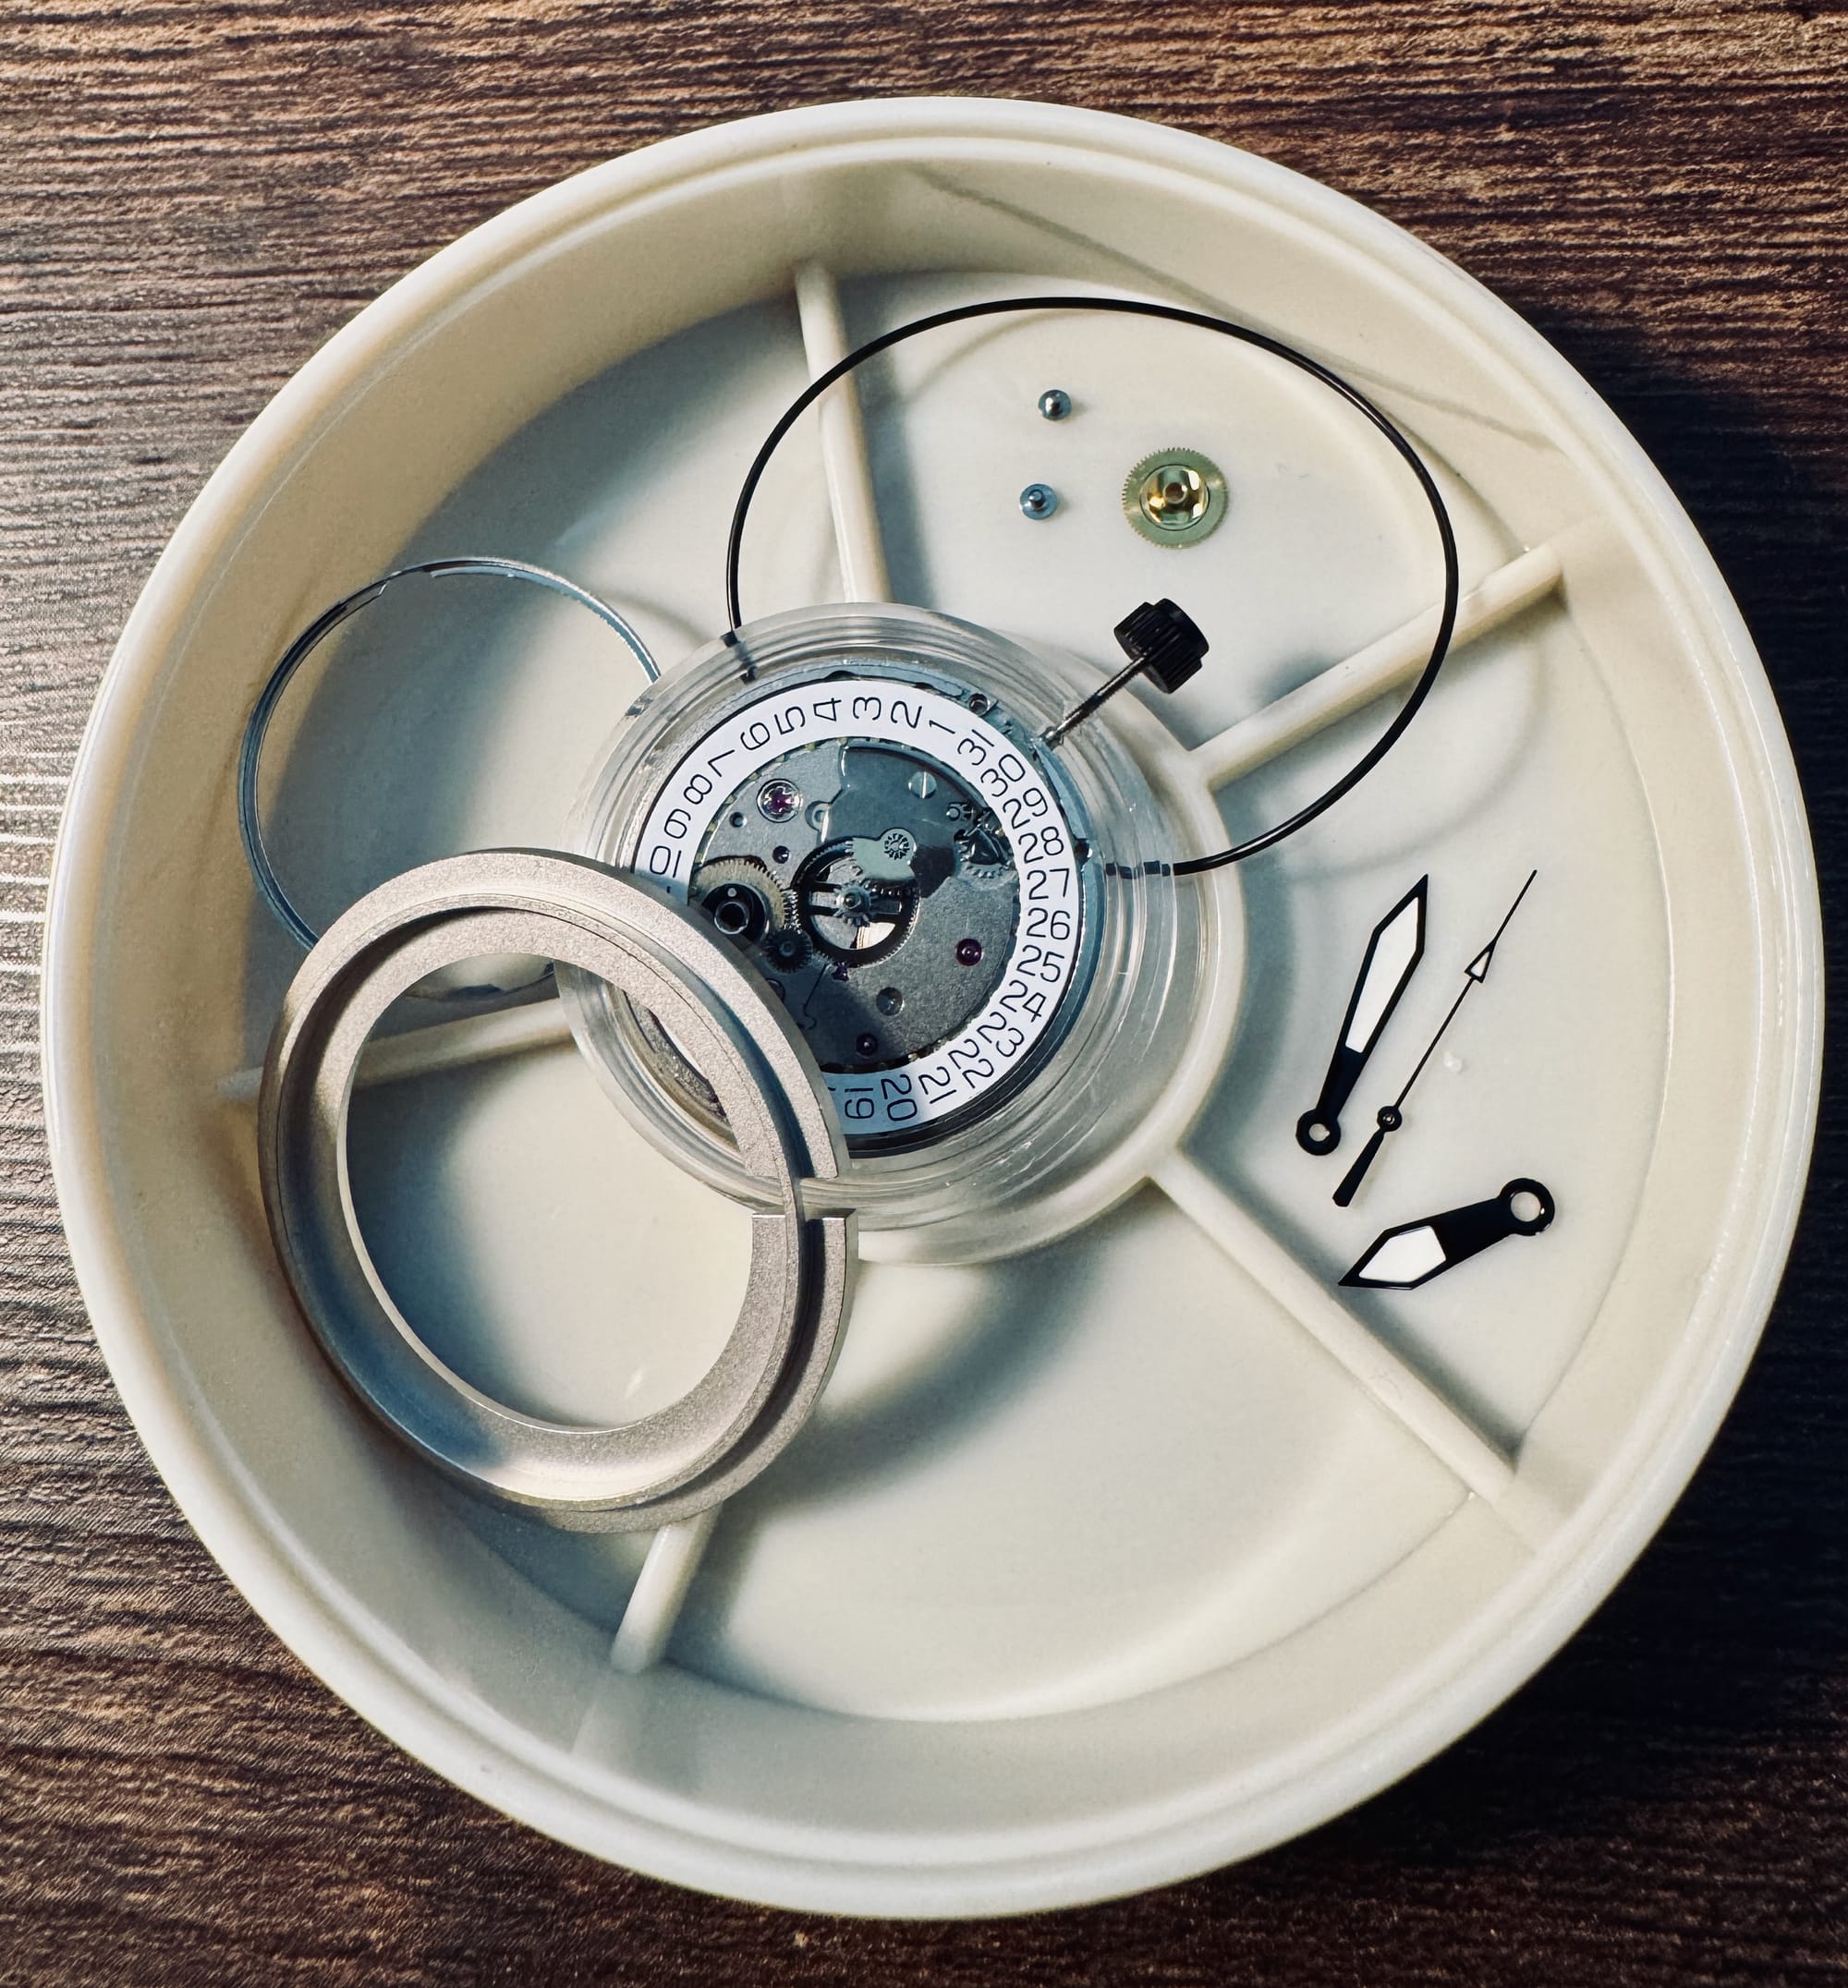
The parts
These are generally the parts for a dive watch, which are complicated by having the rotating bezel on top. Watches that don't have this, like field or aviator's watches, are a little easier.
From left to right, top to bottom:
- A variety of gaskets. There's a gasket that seals the crystal in place, a gasket for the bezel, and a gasket for the rear of the case.
- The click spring that allows the bezel to rotate with clicks.
- A chapter ring, and inside that, a pair of spring bars (that hold the watch band in), the crown, and the stem that screws into the crown. The chapter ring sits above the dial, and adds a vertical (or angled) set of marks for the dial.
- The movement itself, the heart of the watch. This one's a Seiko NH35.
- The case back.
- The watch hands. These are called "snowflake" style hands. I also really like cathedral style hands, and have a few other styles.
- The dial (or watch face).
- The case, with the bezel on it.
- The crystal (wrapped up in parchment to protect it).
- The bezel insert.
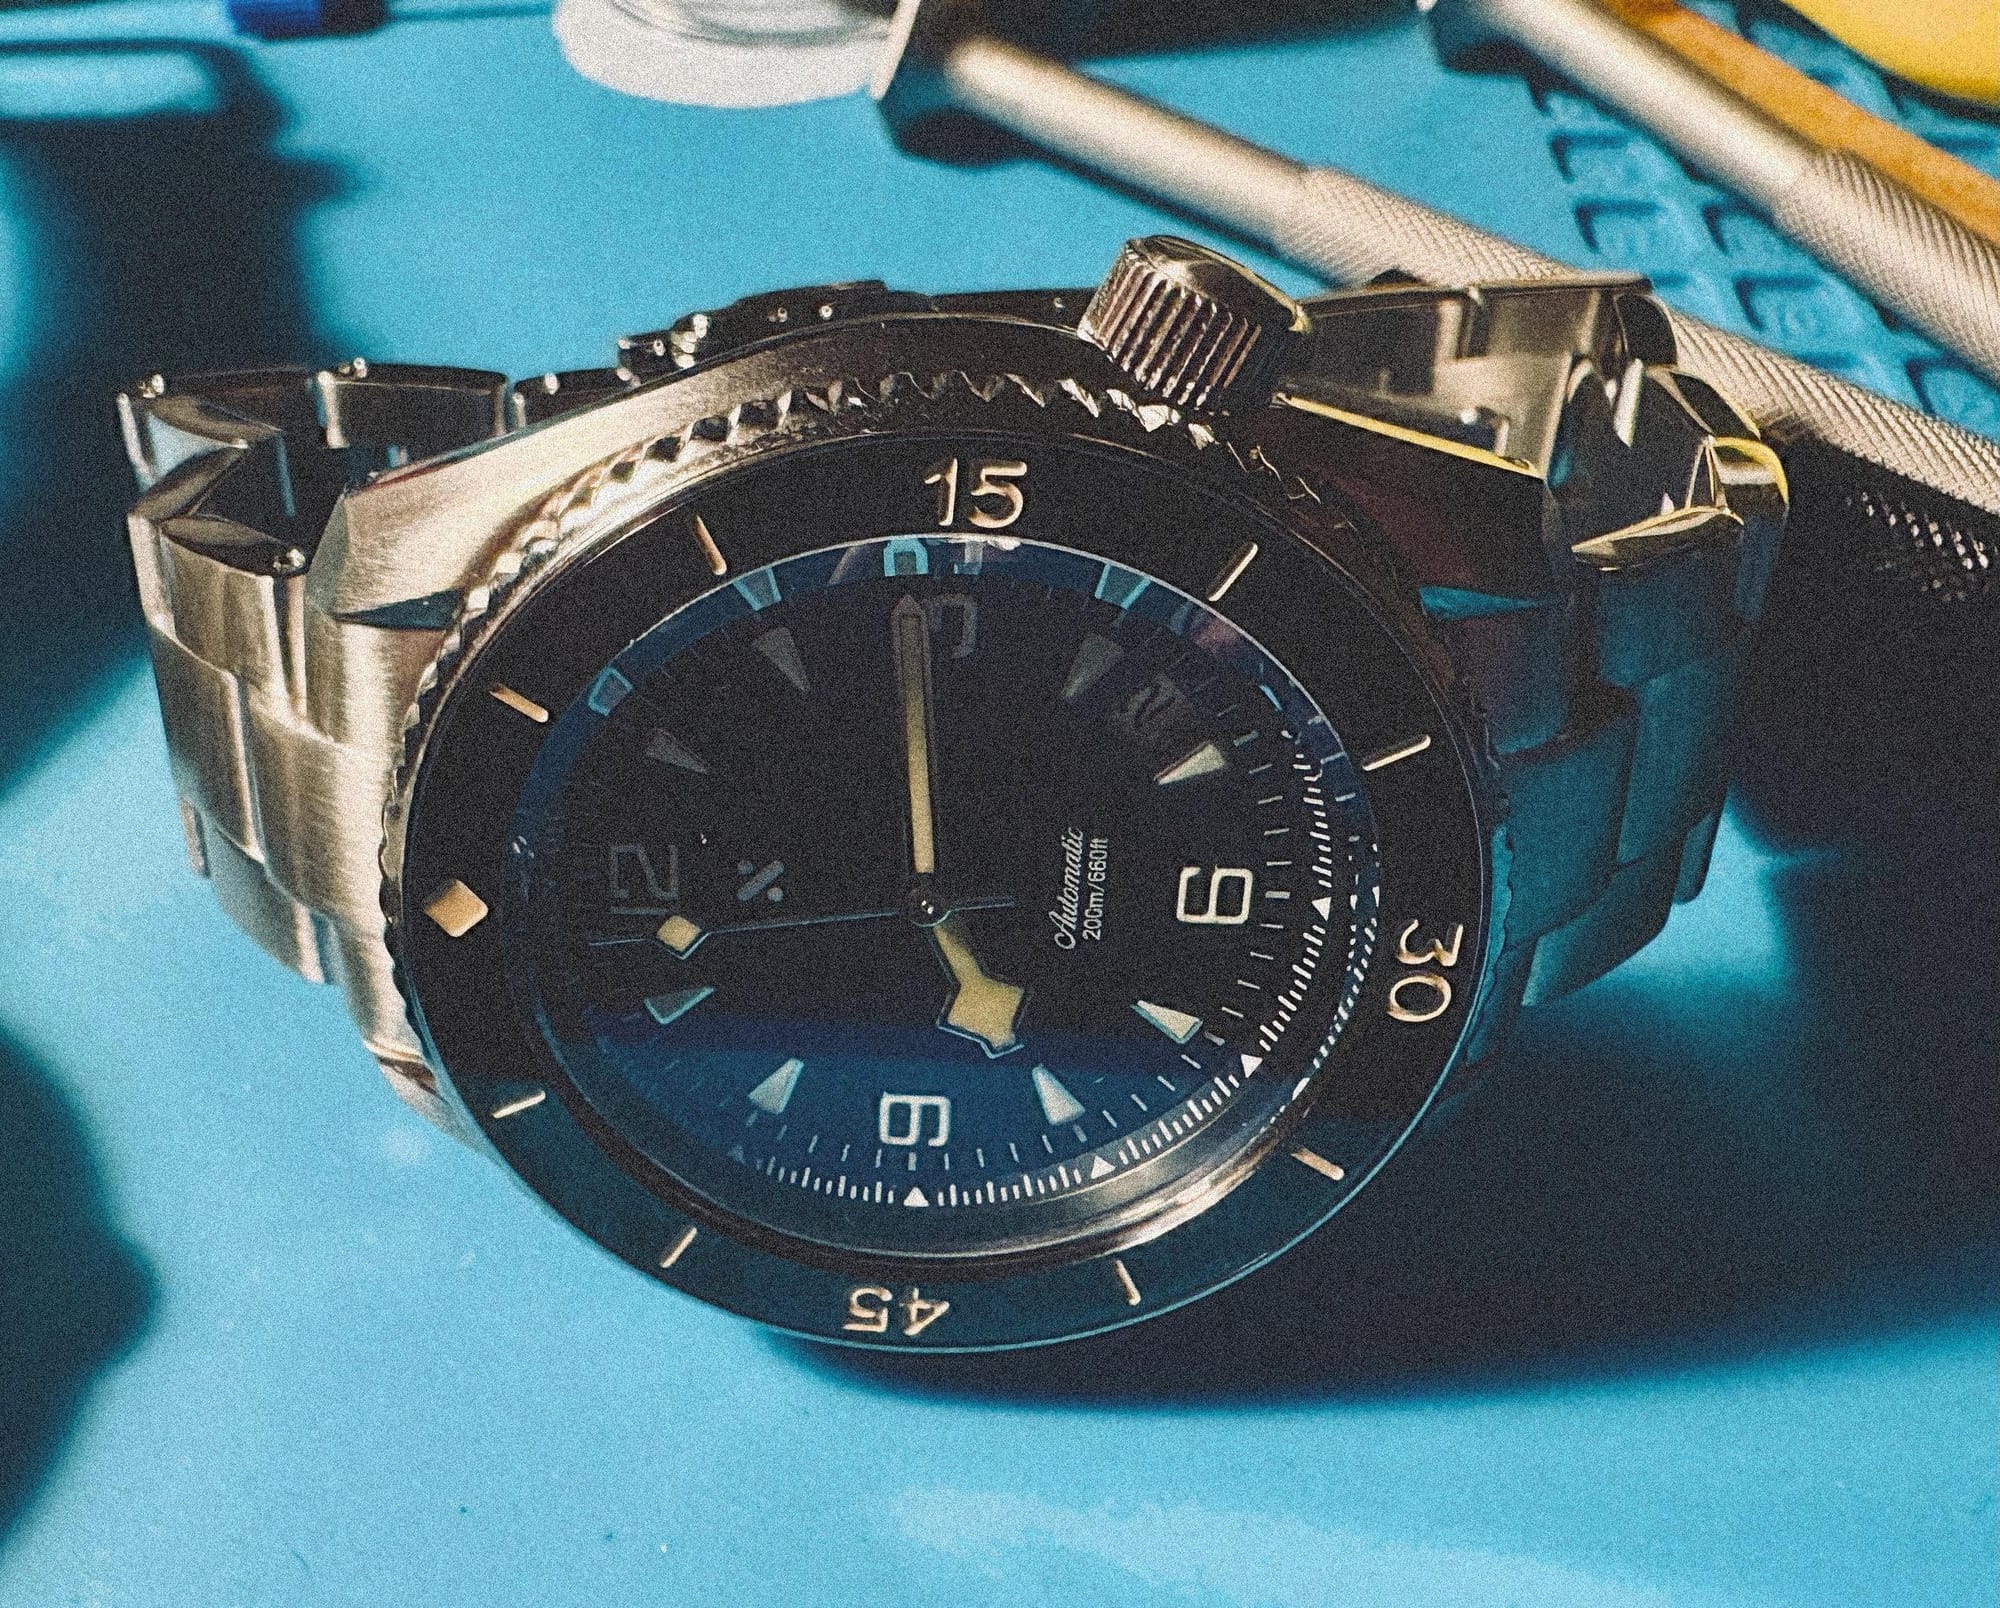
And to illustrate: the assembled watch.
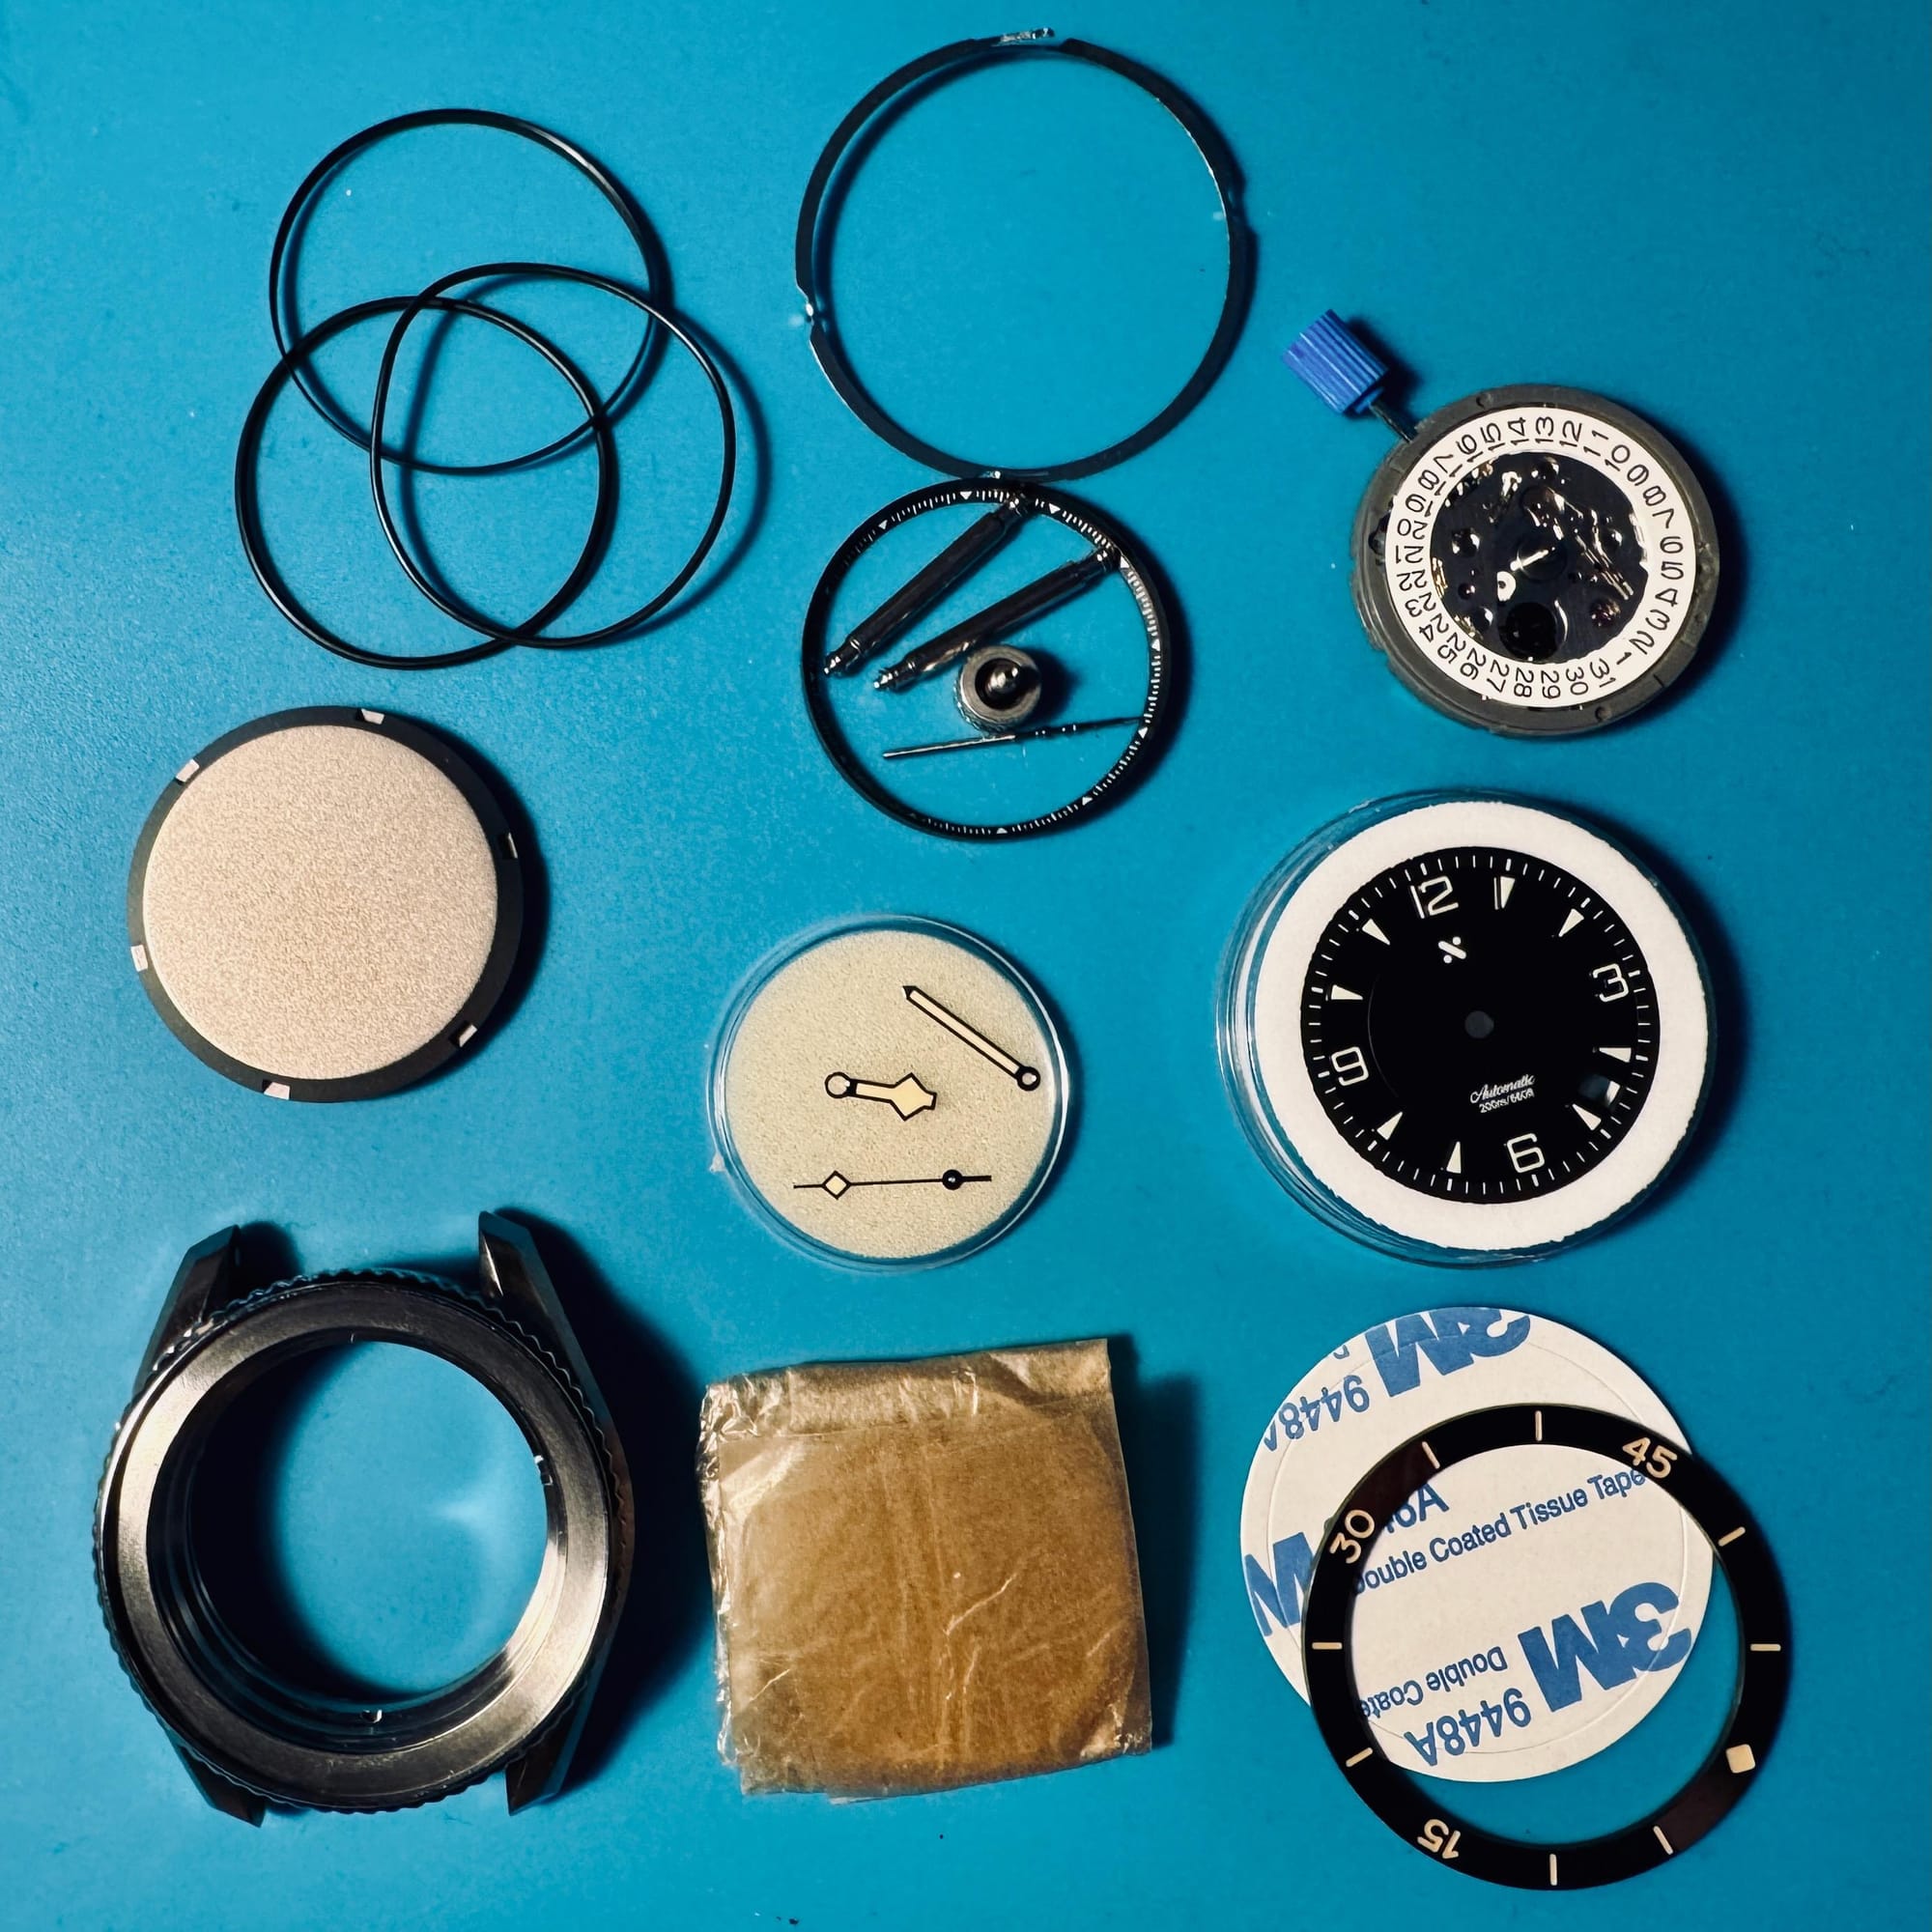
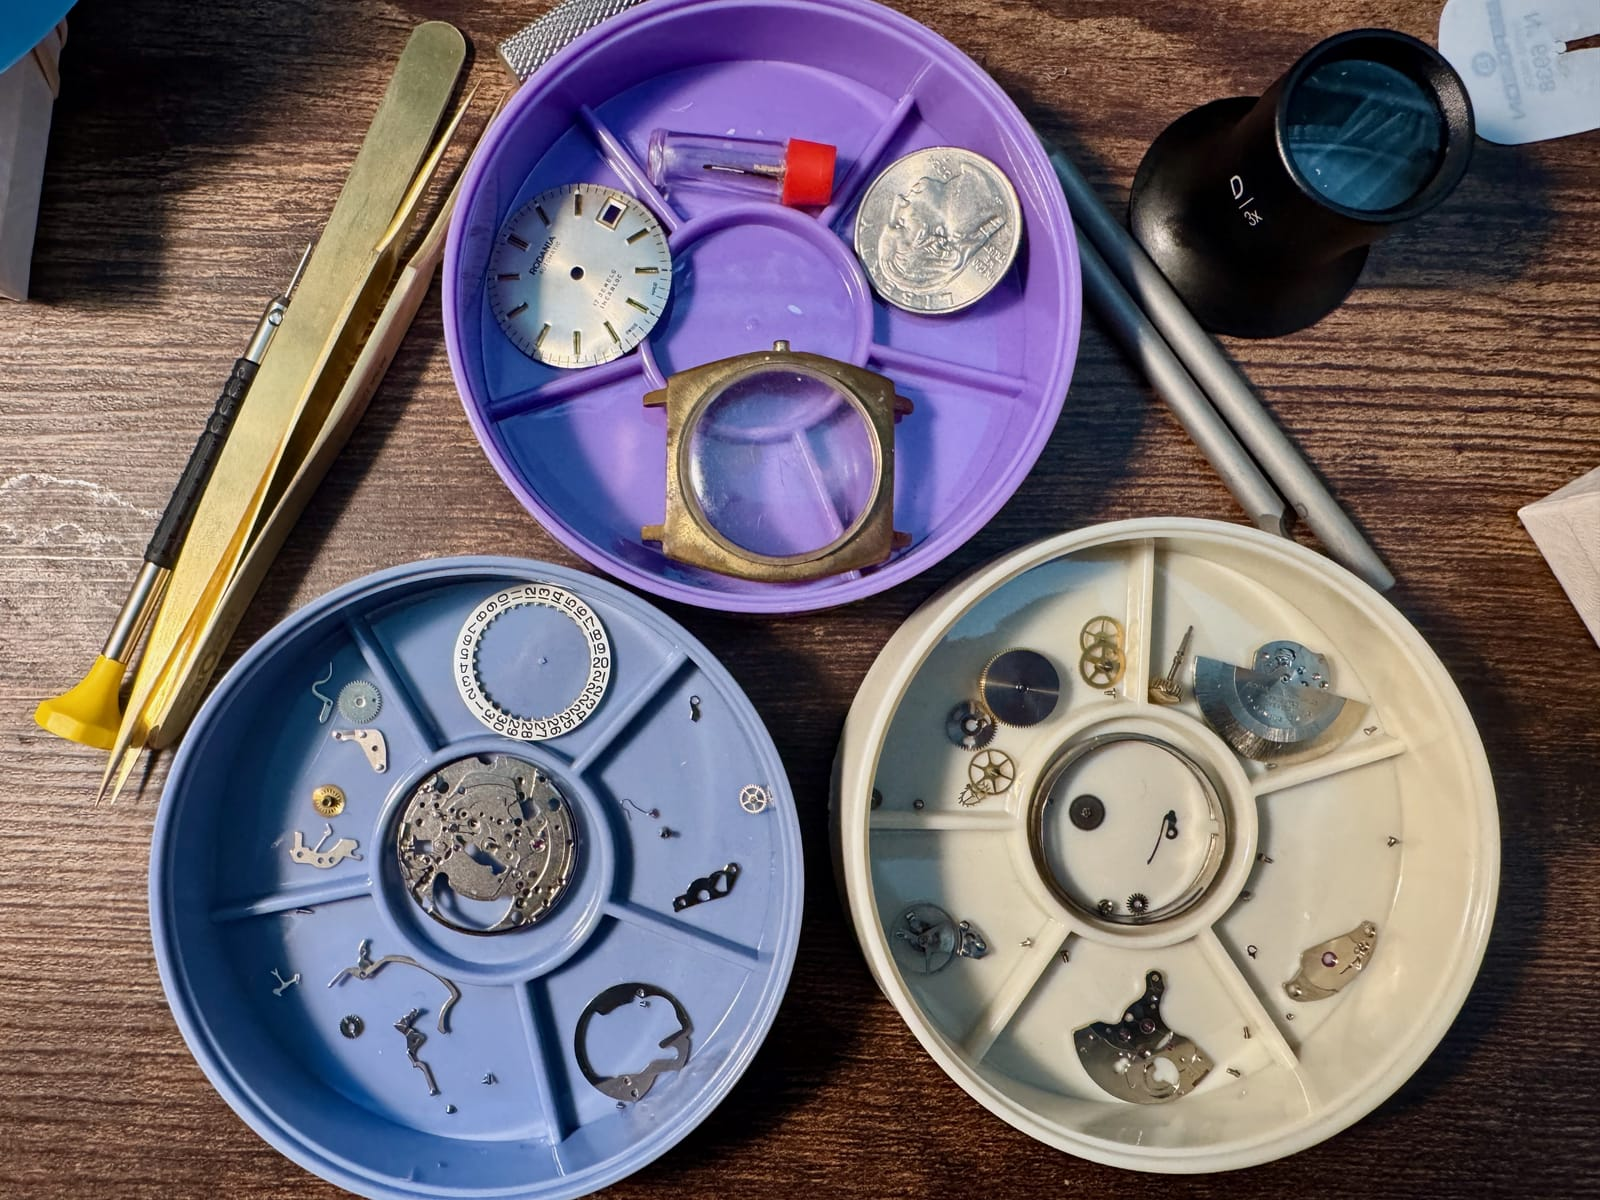
Similarly, here's a parts layout for the Swiss field watch I made.
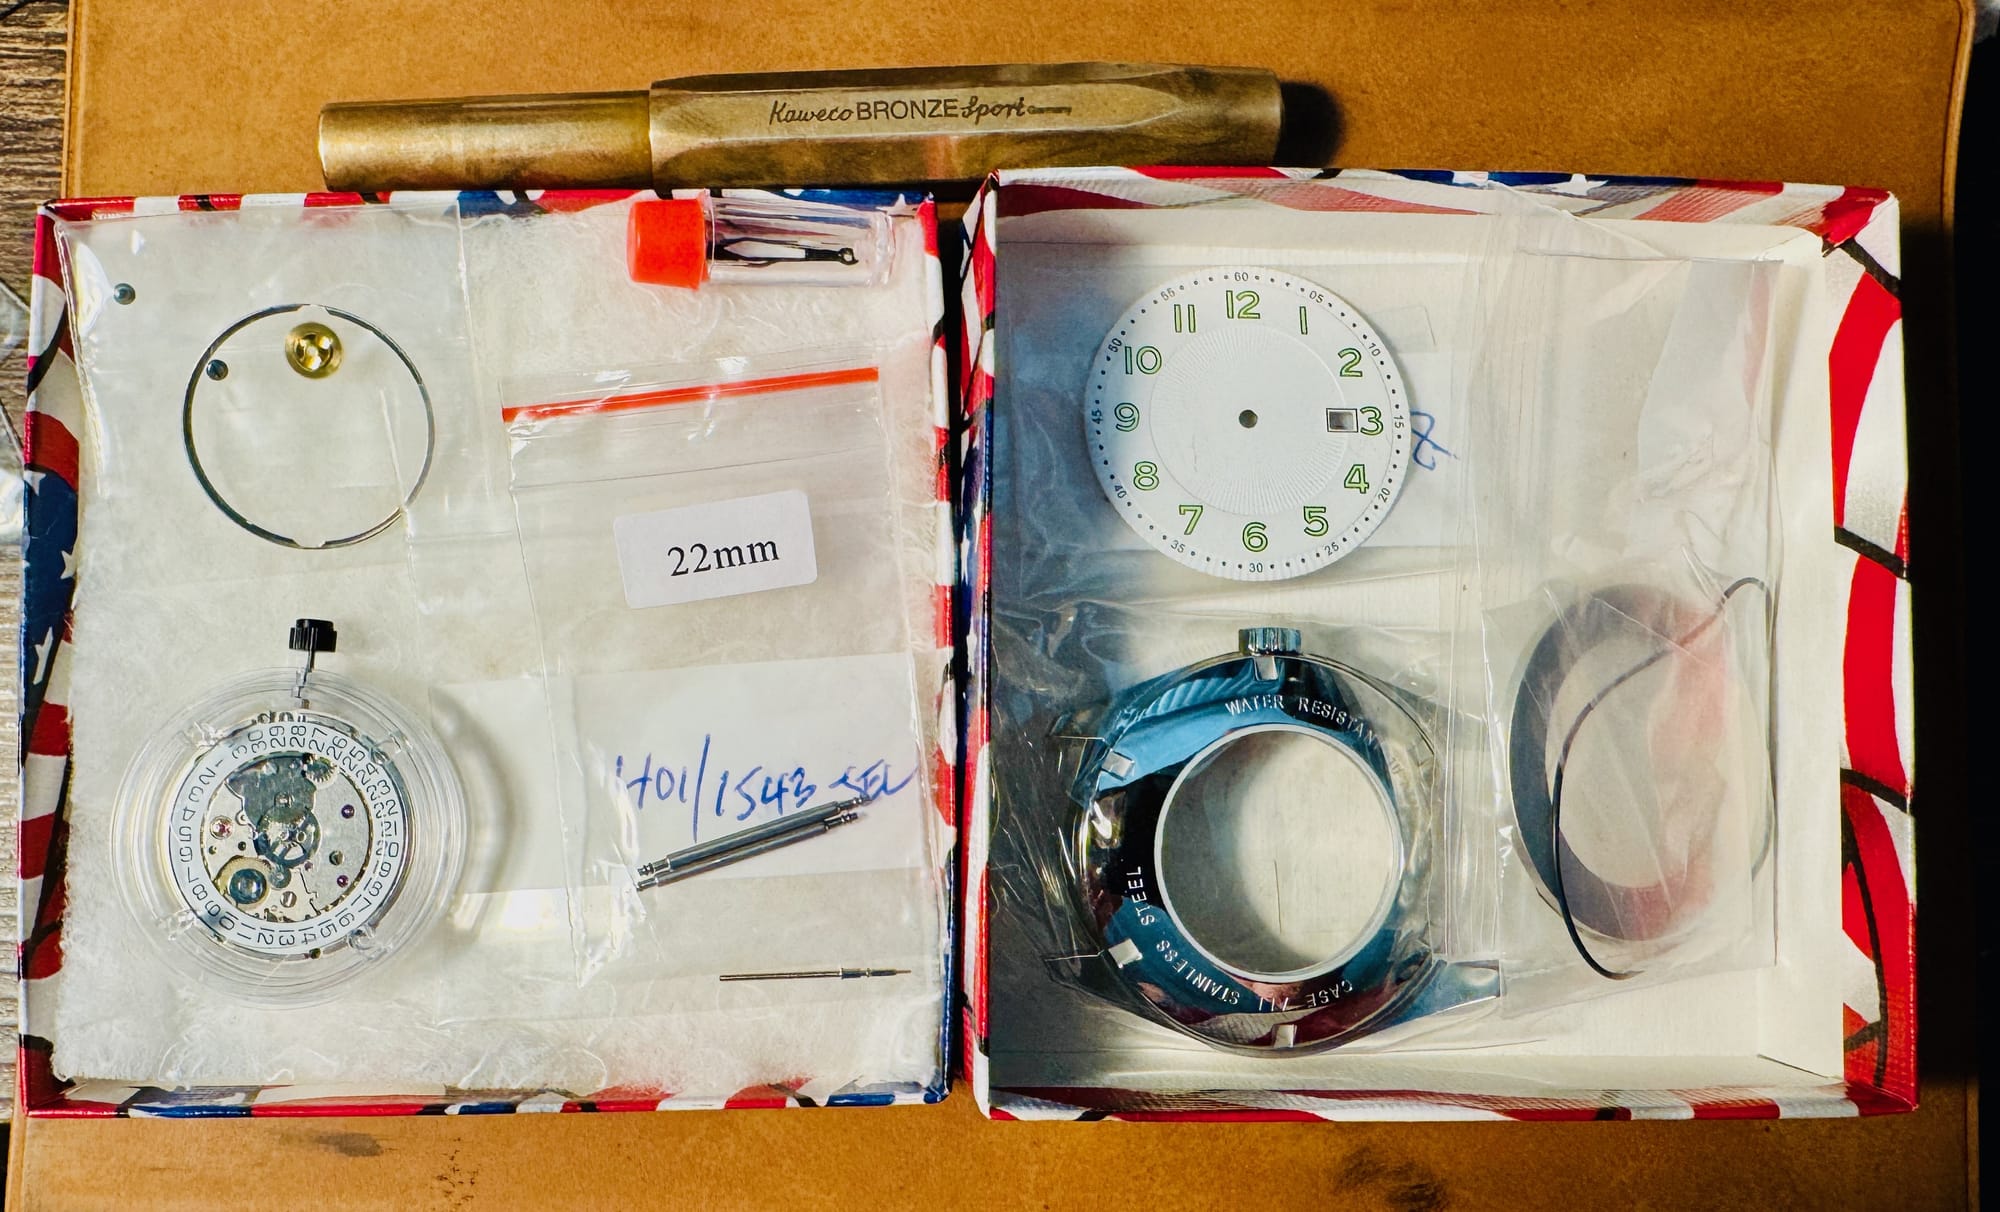
On the left, clockwise:
- The dial support ring and hour wheel (that sets the hour hand), with the two screws for securing the movement in the case ring.
- The watch hands, though you can really only see the minute hand.
- Two spring bars and a crown stem.
- An SW200-1 Swiss watch movement.
On the right, clockwise:
- The dial itself.
- The case ring: the movement sits in this to place it in the case correctly. There's also a case back gasket, which is used to seal the watch when the case is closed.
- The watch case. I have the caseback screwed on, the crystals are already inserted, and the crown (sans stem) is screwed on.
With the first four or five watches I built, the crystals were already inserted. Finding out I needed a crystal press was a change, and I've yet to find one I actually like—I broke the first one because it was so cheap.
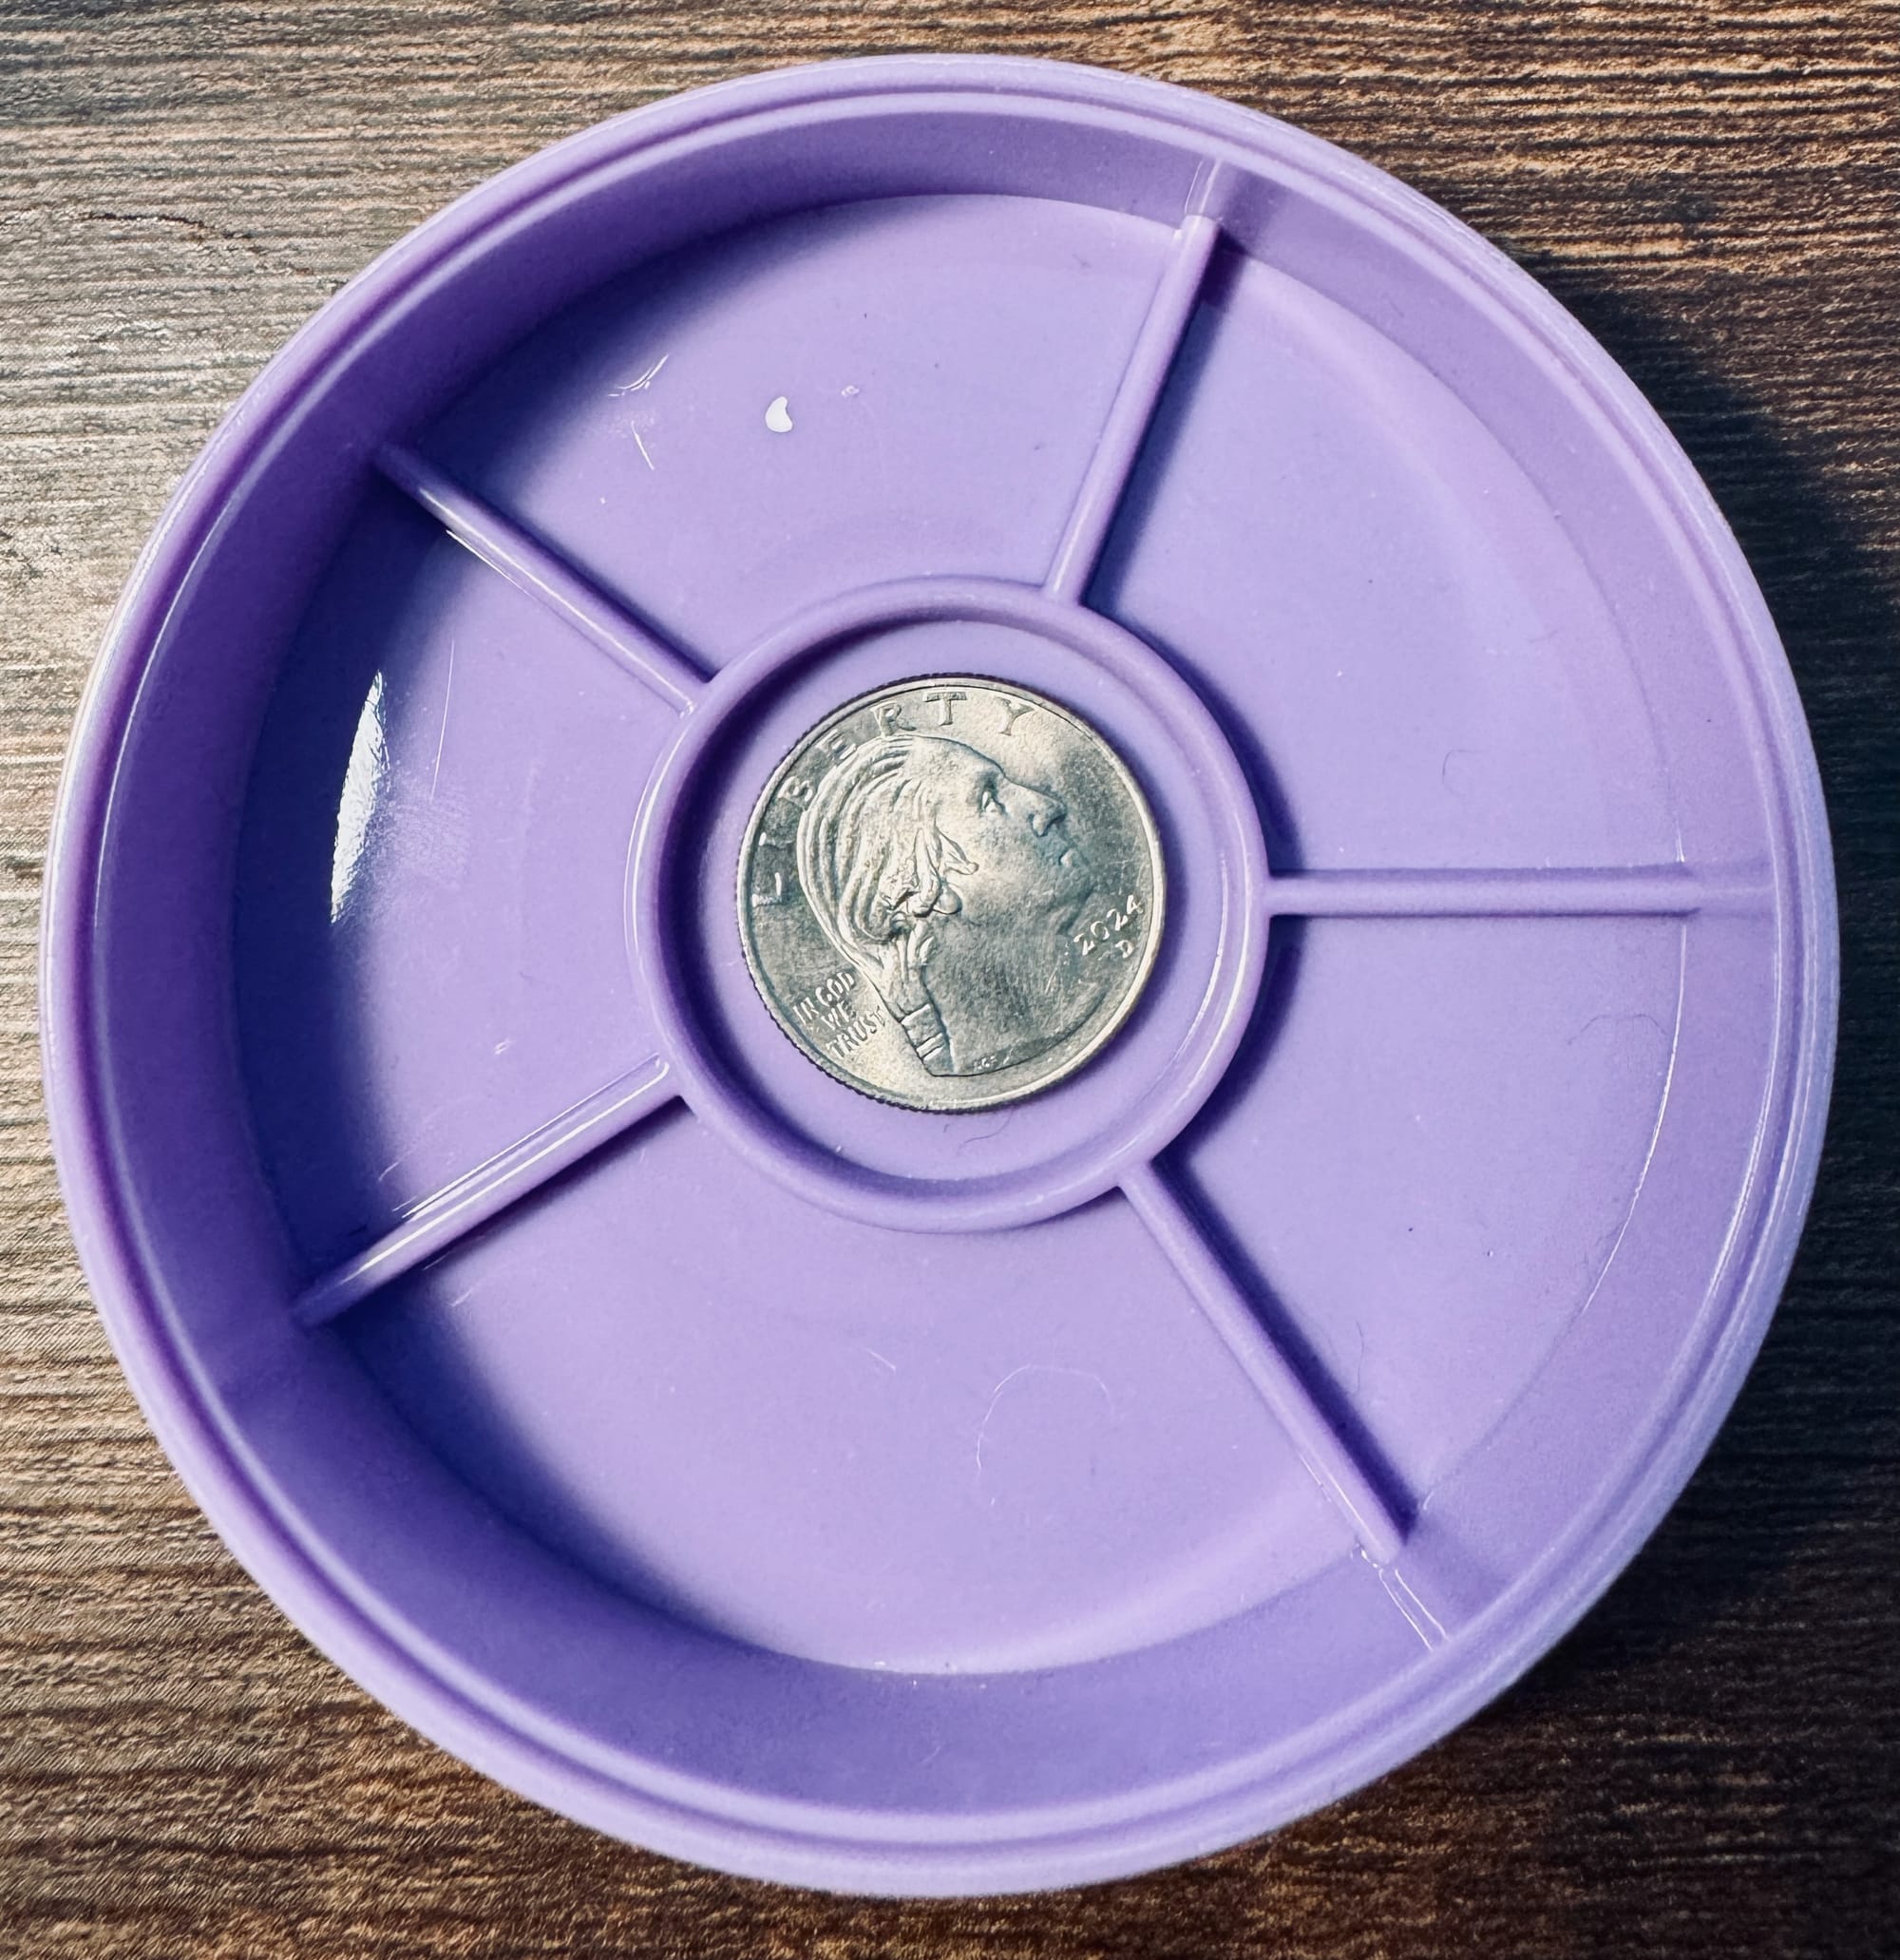
The watch parts collected in parts trays, with a quarter for scale.
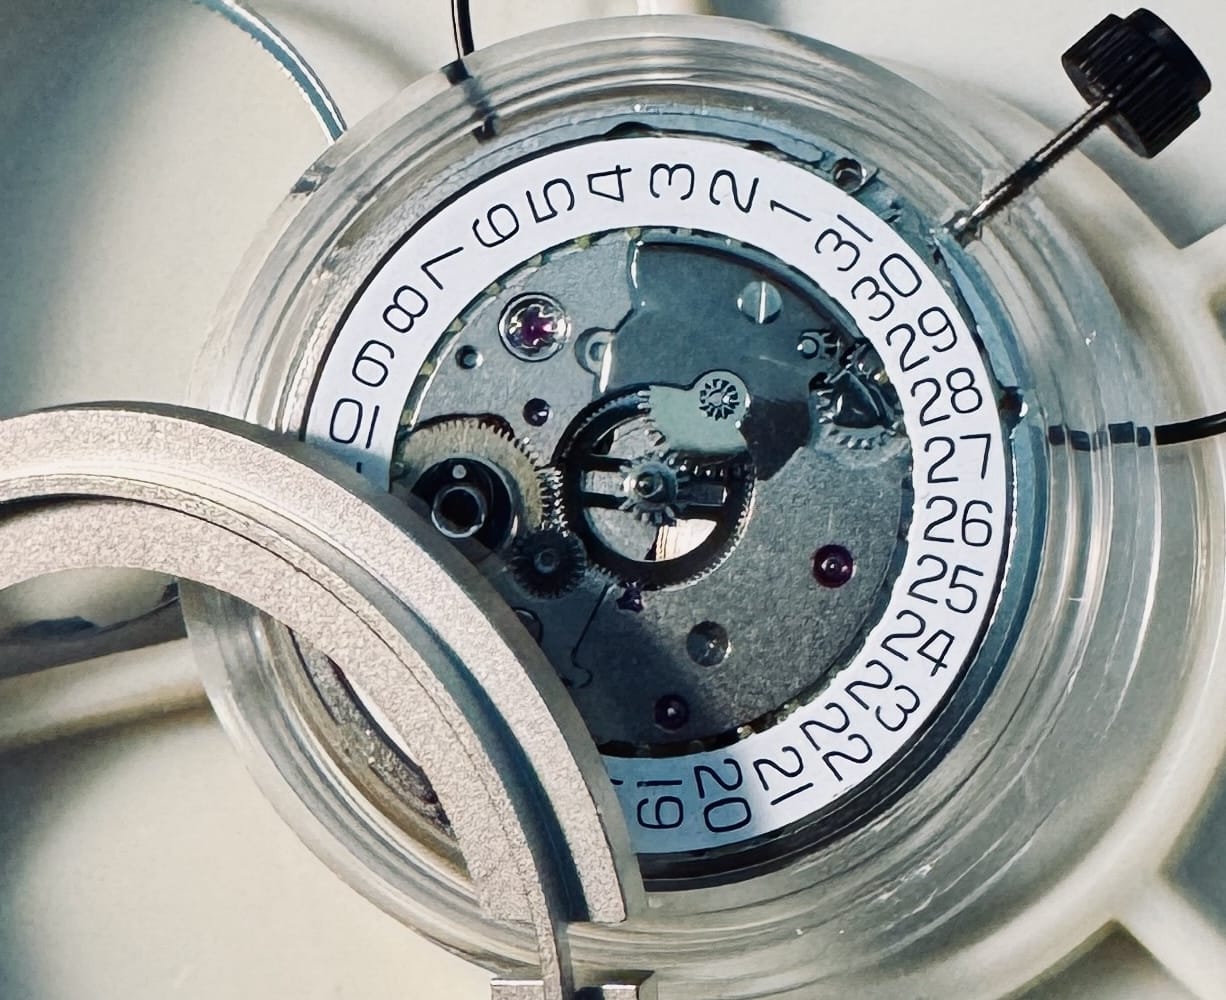
On movements
The movement is the mechanical heart of a watch; all the watches I build have "automatic" movements, or self-winding movements. Mechanical watches don't have batteries, so they need to be wound to run. Fortunately, automatic watches will automatically wind the movement with wear. There's a variety of types ranging in quality; two of the main characteristics that are most useful to people are the reserve and the accuracy. The reserve is how long a watch runs for without winding; roughly 40 hours is pretty common. Mechanical watches, particularly on the lower end, will lose or gain time every day. The Seikos are typically in the range of ±30 seconds per day, while the SW200-1 (a lower-end Swiss movement) is ±5 seconds per day.
Most of the time when building a watch, I don't have to dig into the movement at all, which led me into repairing them. It's fun, but challenging.
The tools
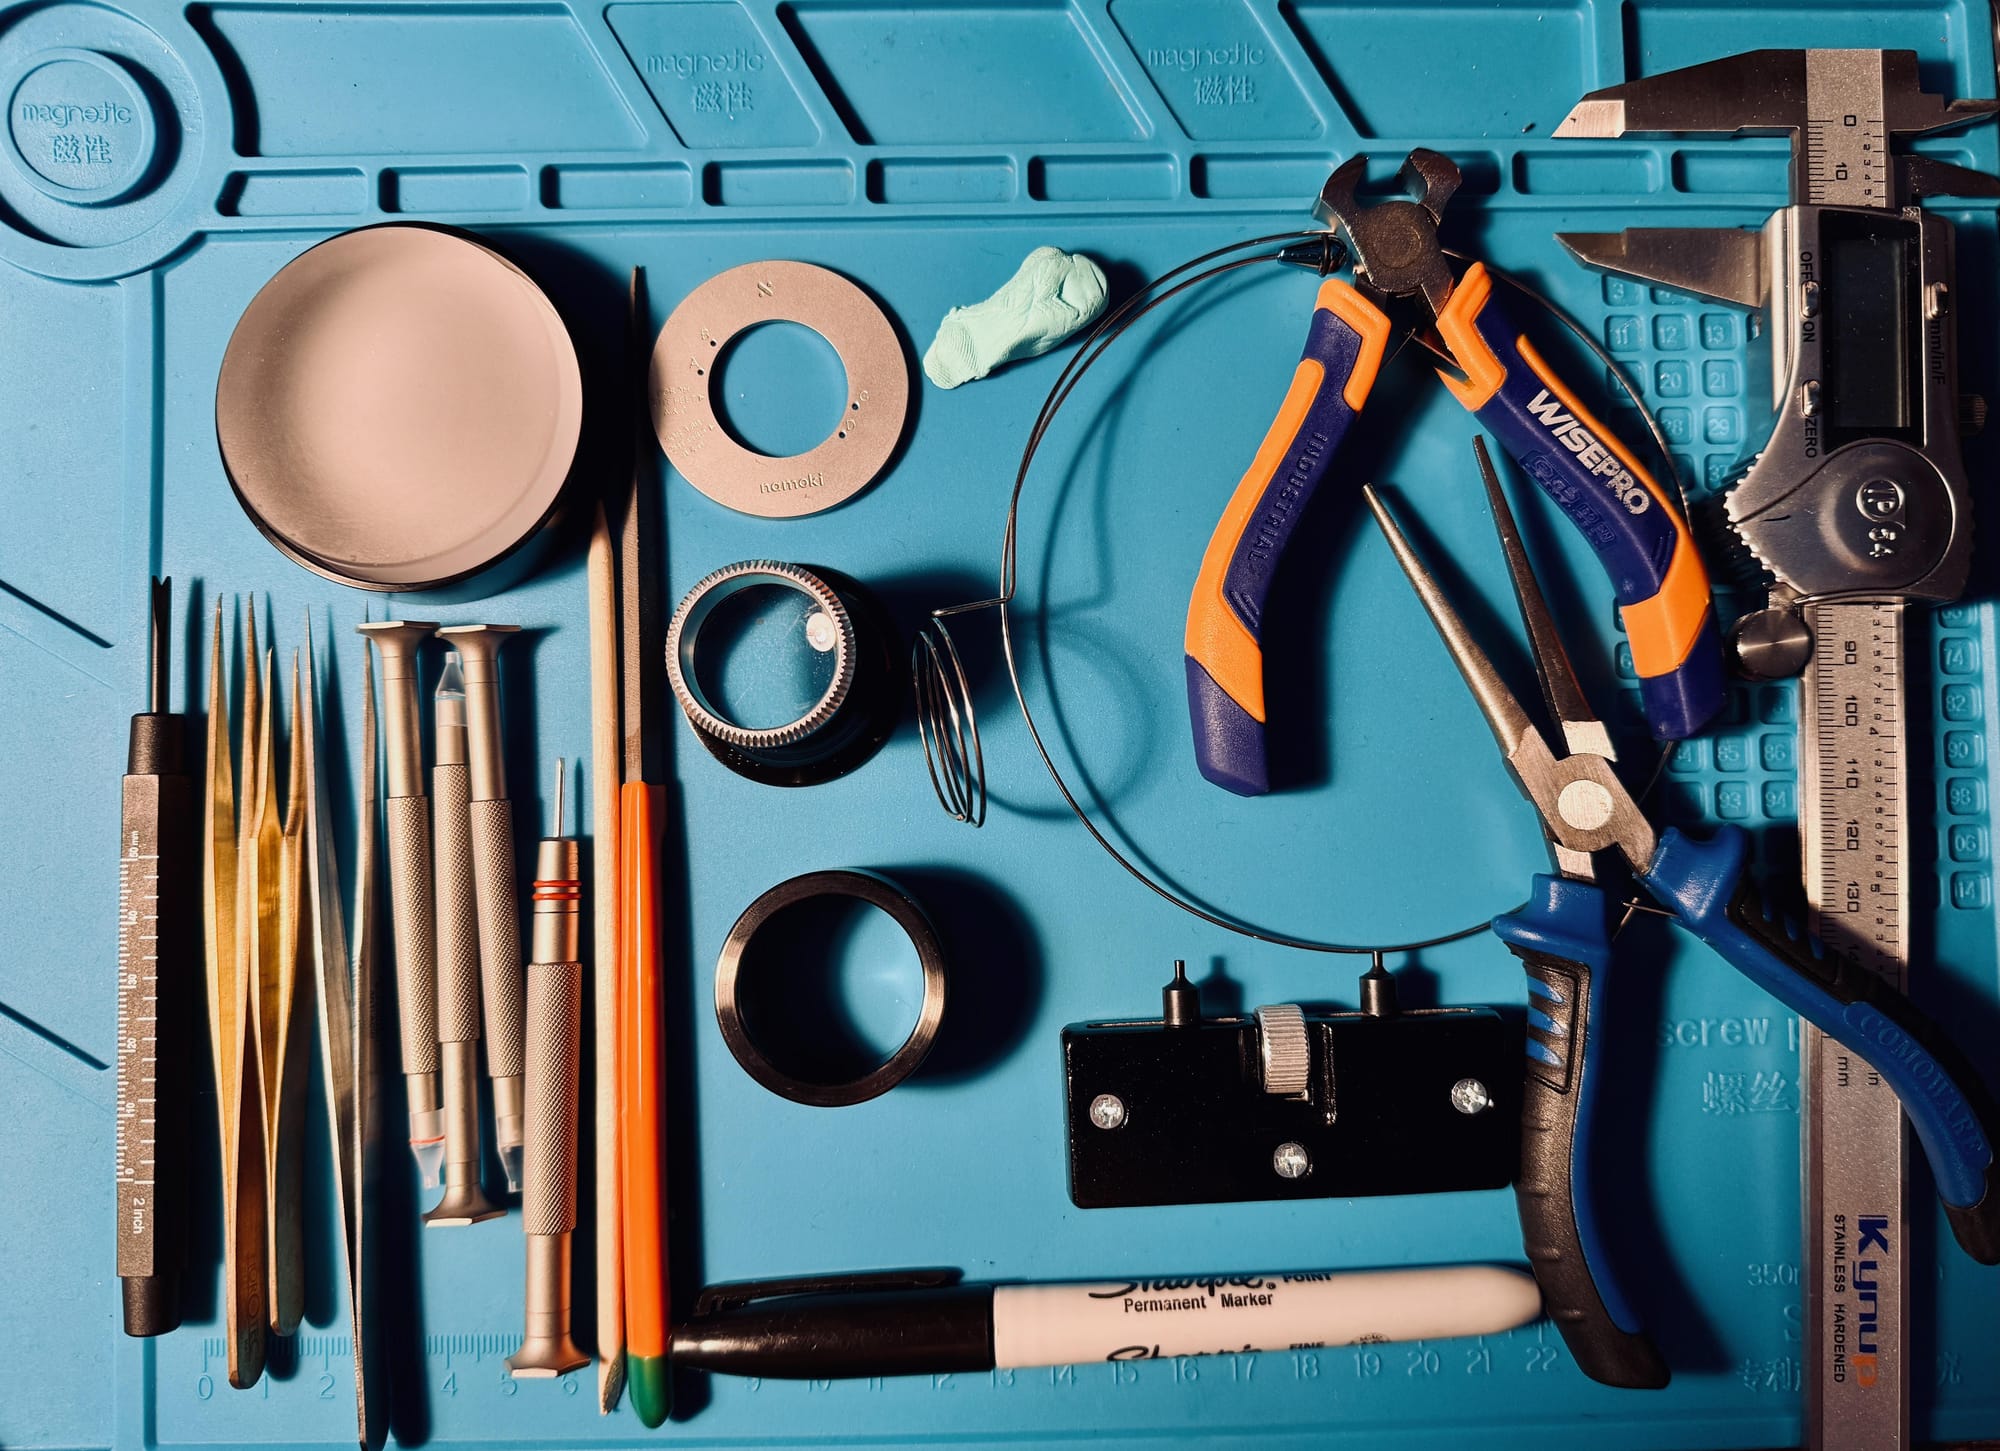
These are all the tools that go into making a watch. Most of these will get used on pretty much every watch, some of them depend on the watch. I also have a press for inserting the crystals (the glass) into the case.
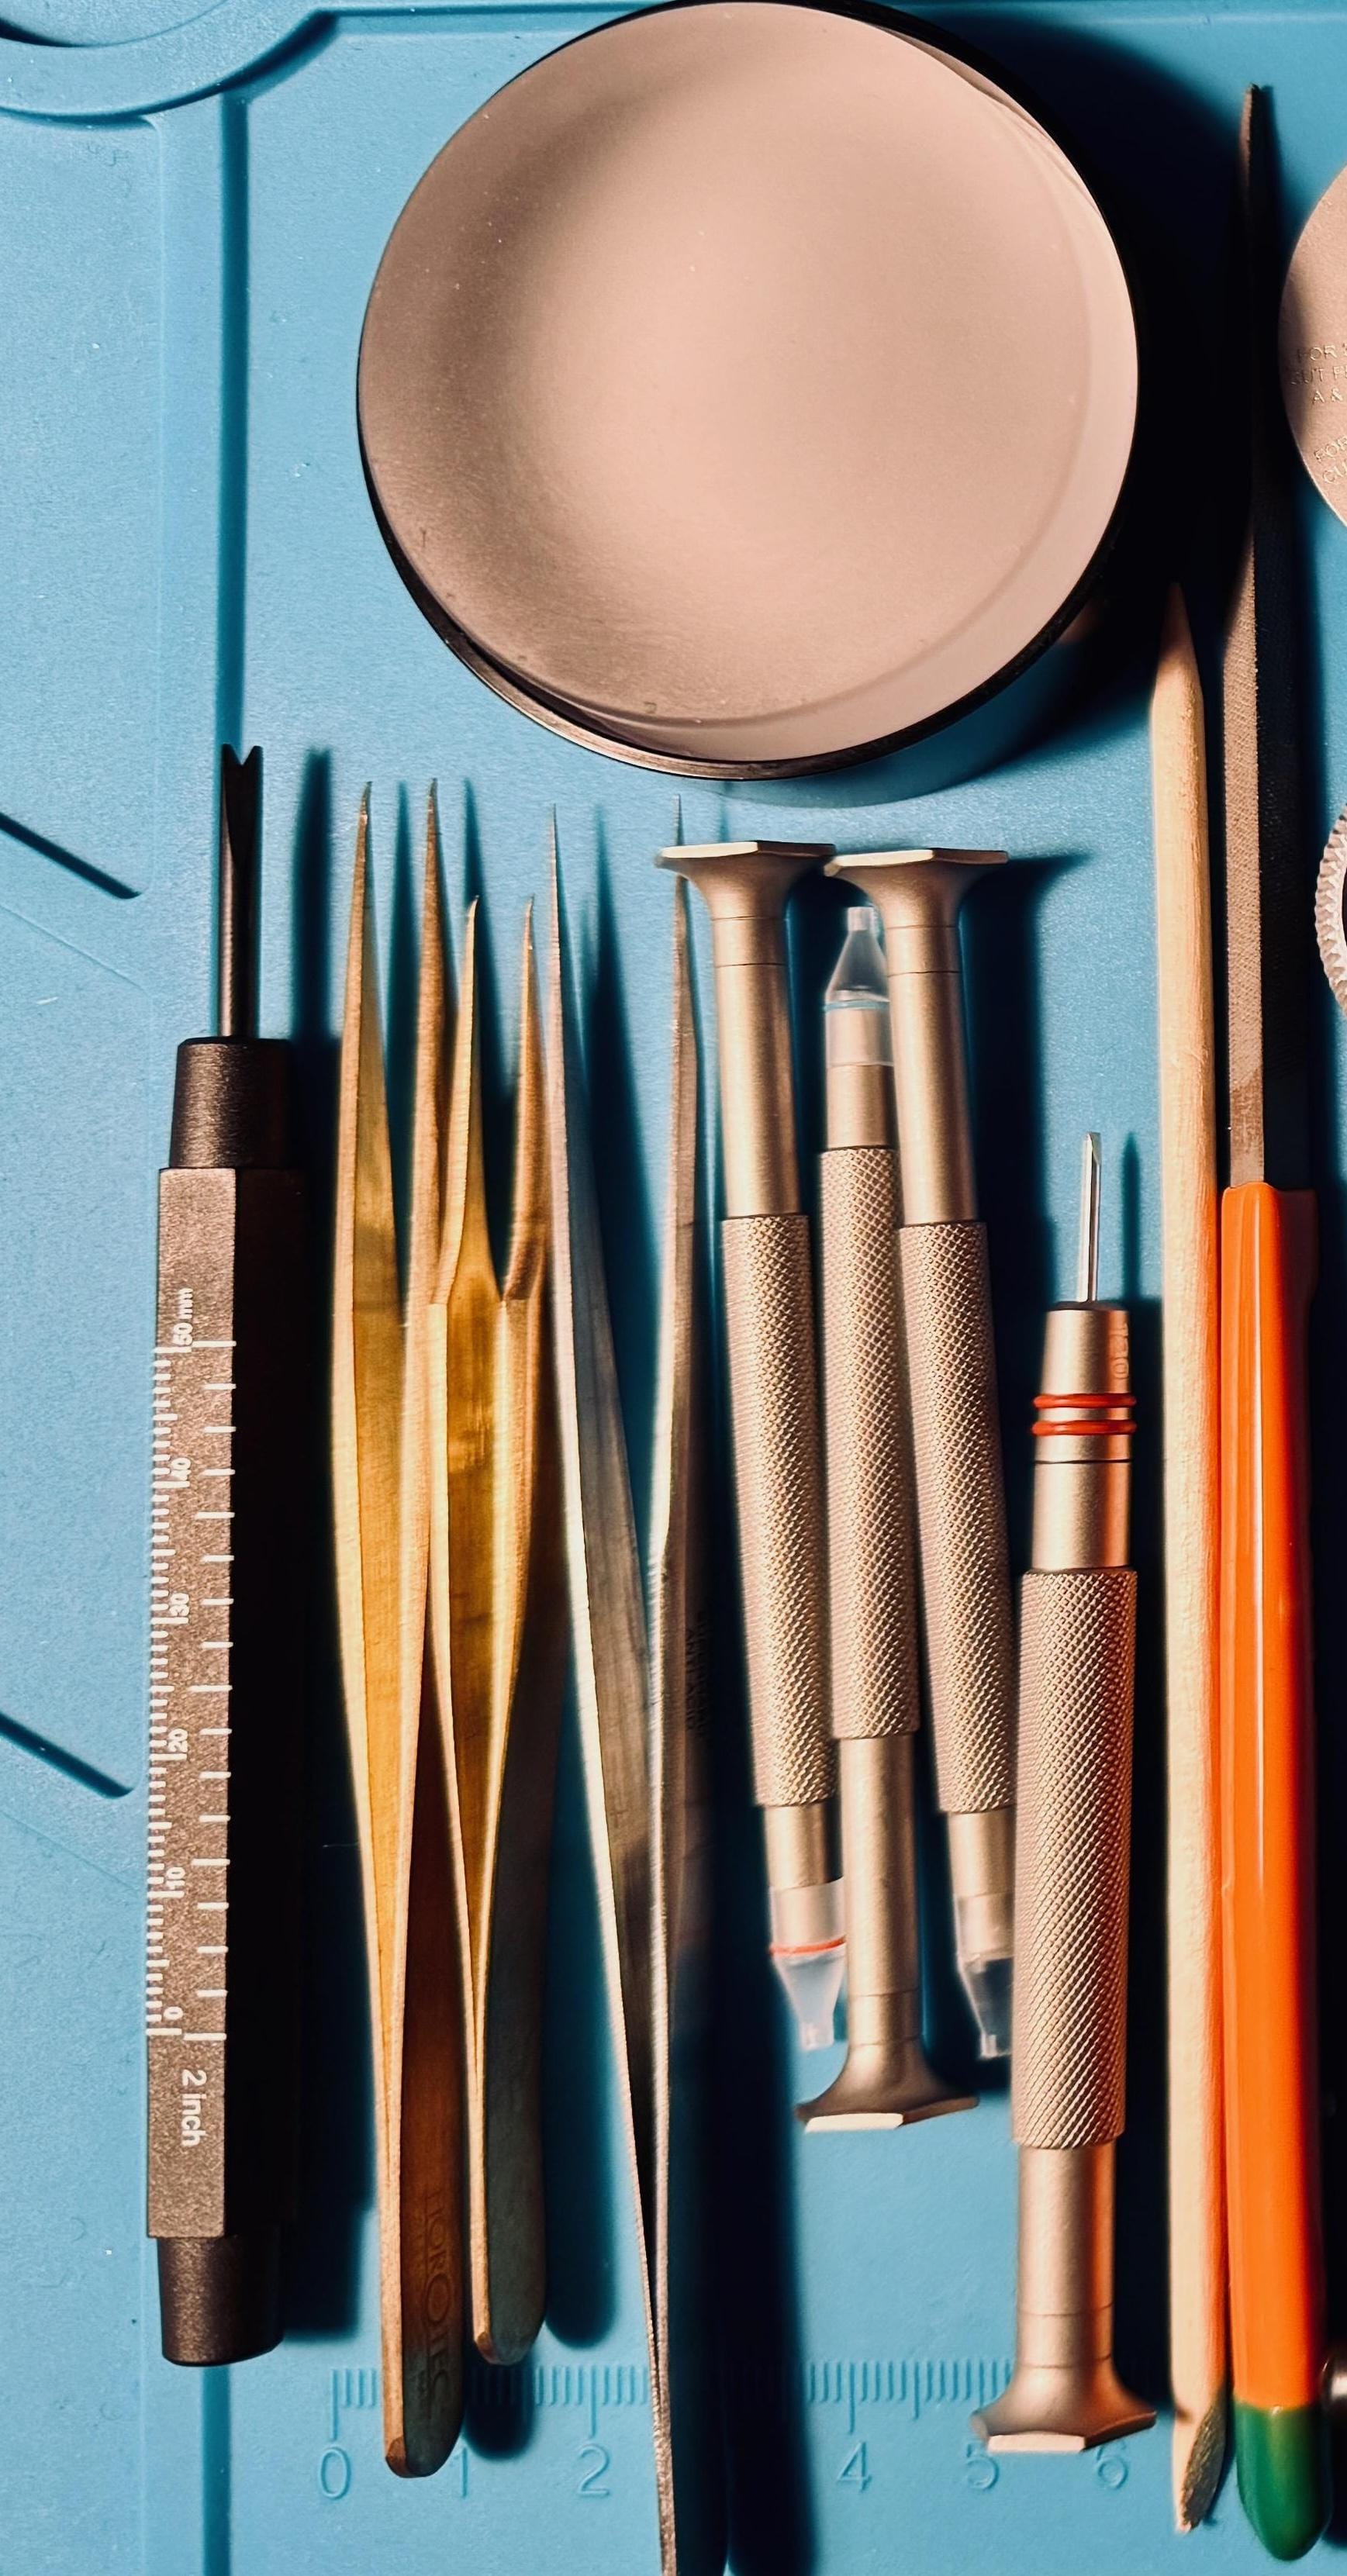
Here's a bunch of tools: there's a cushion to put the parts on while I'm working on them, though I mostly use it now when I'm putting the movement in the watch.
On the bottom, from left to right:
- A spring bar tool for inserting or removing the spring bars.
- A variety of tweezers. I use these for setting the hands and inserting gaskets. Some are brass, some are stainless steel, all are antimagnetic. They have different "feels," some work better for different watch hands or gaskets. I upgraded the brass ones from a cheap Amazon set to $65 a piece Swiss tweezers, and the difference is night and day. I'd forgotten how much a quality tool can really improve your life.
- The hand setting tools. These have holes in the bottom (red and blue) for fitting the hour and minute hands onto the movement, and a flat face for inserting the second hands.
- The screwdriver is used for a lot of little things.
- A pegwood, used for a lot of manipulating things without scratching or damaging them.
- A file, used when adjusting the length of the stem.
The next column of parts is a dial tool, which is helpful for figuring out how to trim the dial so it fits onto the movement, a loupe, and a movement holder. The movement hold keeps the watch movement in place while I'm placing the dial or setting the watch hands.
Dials come with "feet" that insert into the movement, and their orientation depends on where the crown is. Some watches have their crown at the 3 o'clock position, but the 4 o'clock (or 3.8H) position is also common. In order to get the dial to fit in the correct position, certain feet must be clipped off; I've damaged a few dials by clipping the wrong feet.
The green-blue putty is called Rodico, and it's used for cleaning, holding watch hands, or picking things up.
There's a wire harness for holding the loupe in place around my head, a stem trimmer, and needlenose pliars that I use for removing dial feet. The calipers and sharpie are used for sizing the stem, and finally, a caseback tool for removing or screwing down a watch caseback.
Putting a watch together
First, I sit down and arrange my tools. They'll become... disarranged... later, it happens. At least I start with them arranged, and as I get better, I'll get better at tool organization. Then I throw in my earbuds, fire up my "Watchmaking" playlist on the iPod classic. It's all classical music and opera, and it helps to focus.
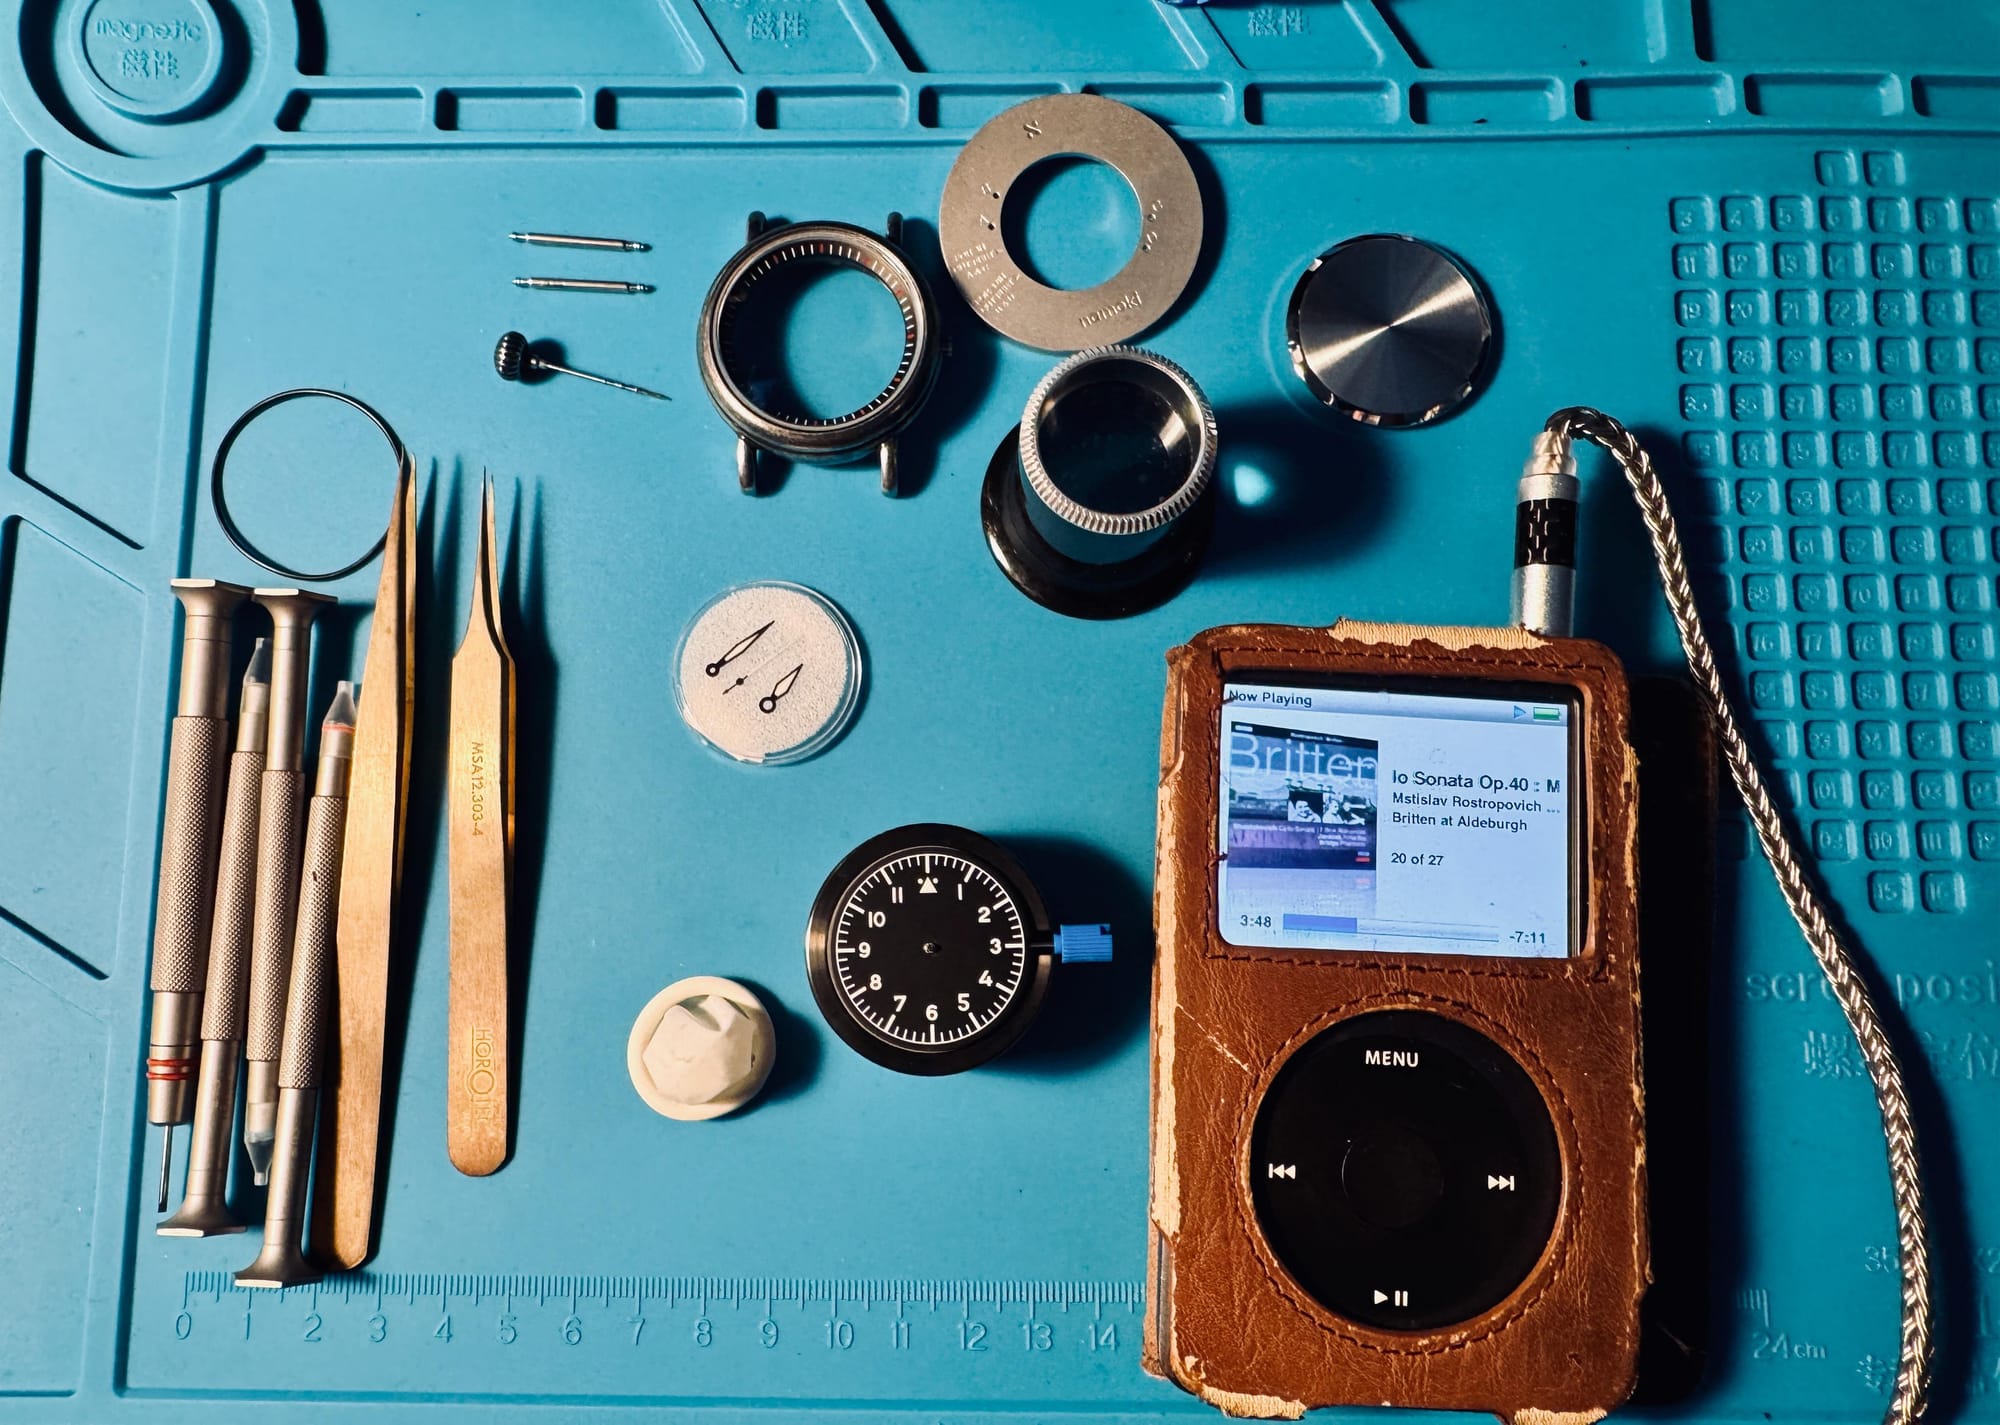


The playlist, at least for now.
I usually start with the dial, and get it seated on the movement. Then comes setting the hands. This can be particularly challenging, and is probably the part that takes the longest. In my experience, it usually goes right on the first shot, or it needs to be redone a few times. What does it take to set the watch hands
First, you have to get the movement in the right position. If the dial doesn't have a date window, it doesn't matter. Otherwise, you need to set the time on the movement until right as the day clicks over to the next day. Then, you place the hour hand, aligning with the 12 o'clock position, and use the right hand-setting tool to press it down onto the movement. You have to do the same with the minute hand. The second hand can go wherever, I usually it more or less to the 15 second position. This one is the most challenging; the hour and minute hands are rings that fit around a post, while the second hand has to fit onto a tiny post. With the Seikos, it's 0.20 mm in diameter, or less than 8 thousands of an inch. The SW200-1 is a little large, 0.25mm. Sometimes it's easy, sometimes it's not. It is a slow, steady process and it can take a couple hours to do right on a bad day.
On some cases, you'll need to press the crystal in. For dive watches (and some field watches), you'll need to insert a chapter ring first. Then, a crystal gasket, which is made of a stiffer plastic, goes in to seal the edges of the crystal. You place that in the crystal press (using a microfiber cloth to protect the glass), apply pressure, and it should fit in. This is probably the second most painful part for me right now, as I don't have a good press yet.
On dive watches, you need to assemble the bezel. Many of these use a strong adhesive, so you can just drop that on the bezel. The bezel also needs a bezel gasket, and the click spring needs to be inserted on the case. So far all of the bezels of my watches are press fit (a significant press), and voilà, the bezel is now on the case.
Then, the movement (with dial and hands) is aligned inside the case, making sure to align the stem hole with the crown on the case. Once fit properly, the stem itself has to be trimmed to the appropriate size. Once it's sized up, you can then loctite (I use blue) the crown onto the stem.
On watch bands
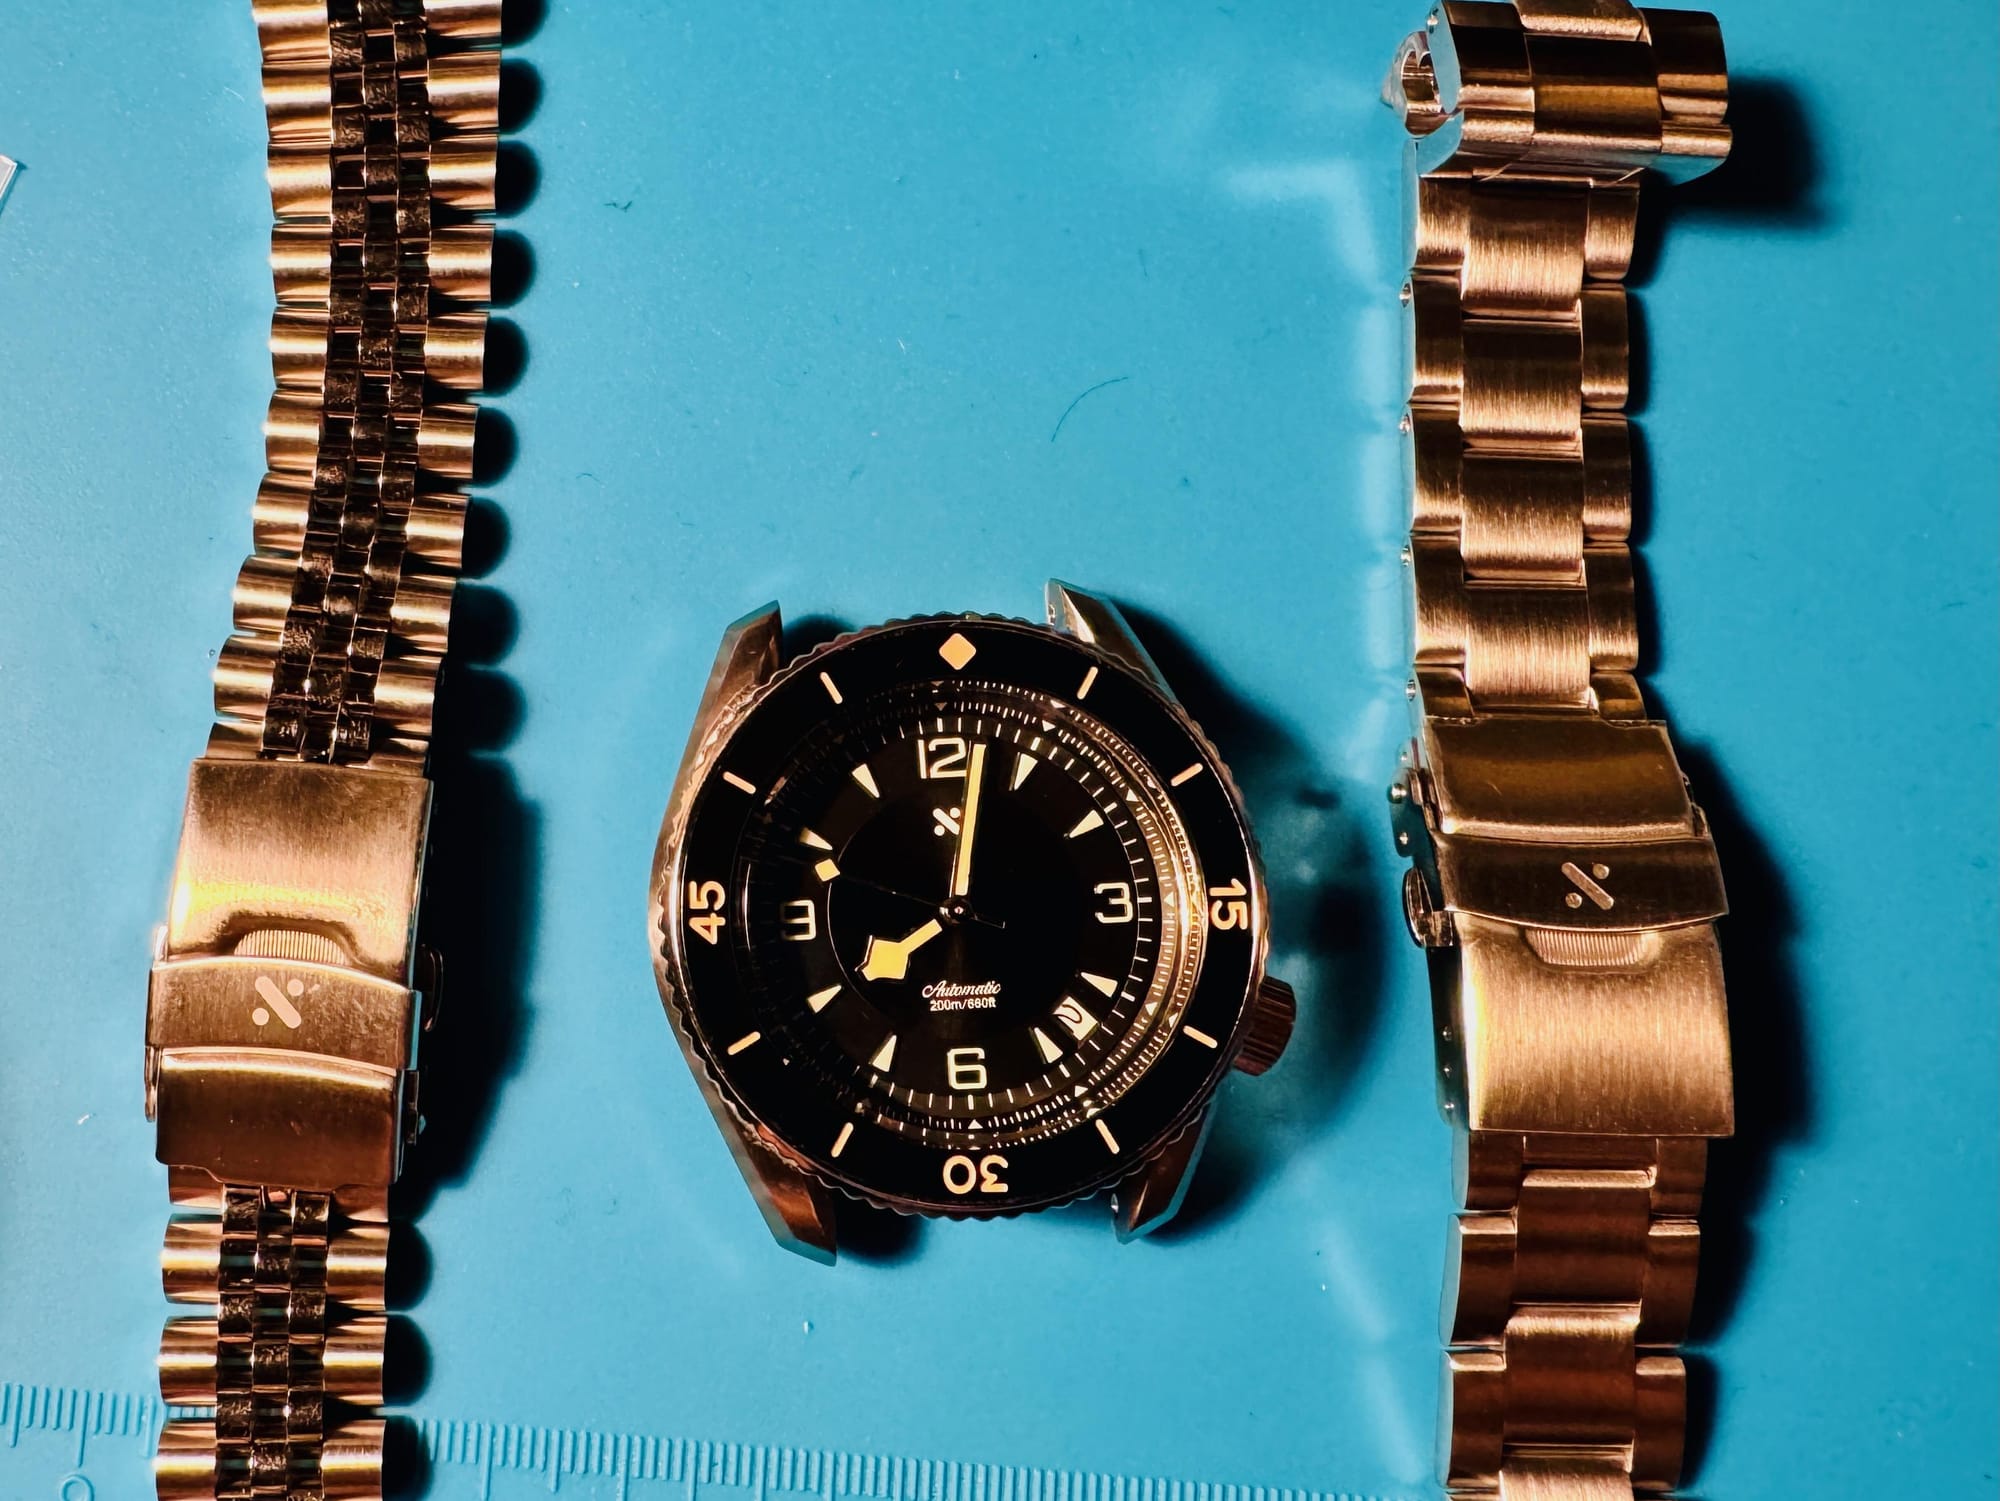
Finally, you have to choose a watch band. For stainless steel bands, there's two styles that are common with Seikos: the oyster style and the jubilee style.
For other bands, there's NATO-style and two-piece bands. Generally, NATO bands are nylon (or canvas), with a lot more options for two-piece. There are NATO leather bands, but I've never found one I liked.
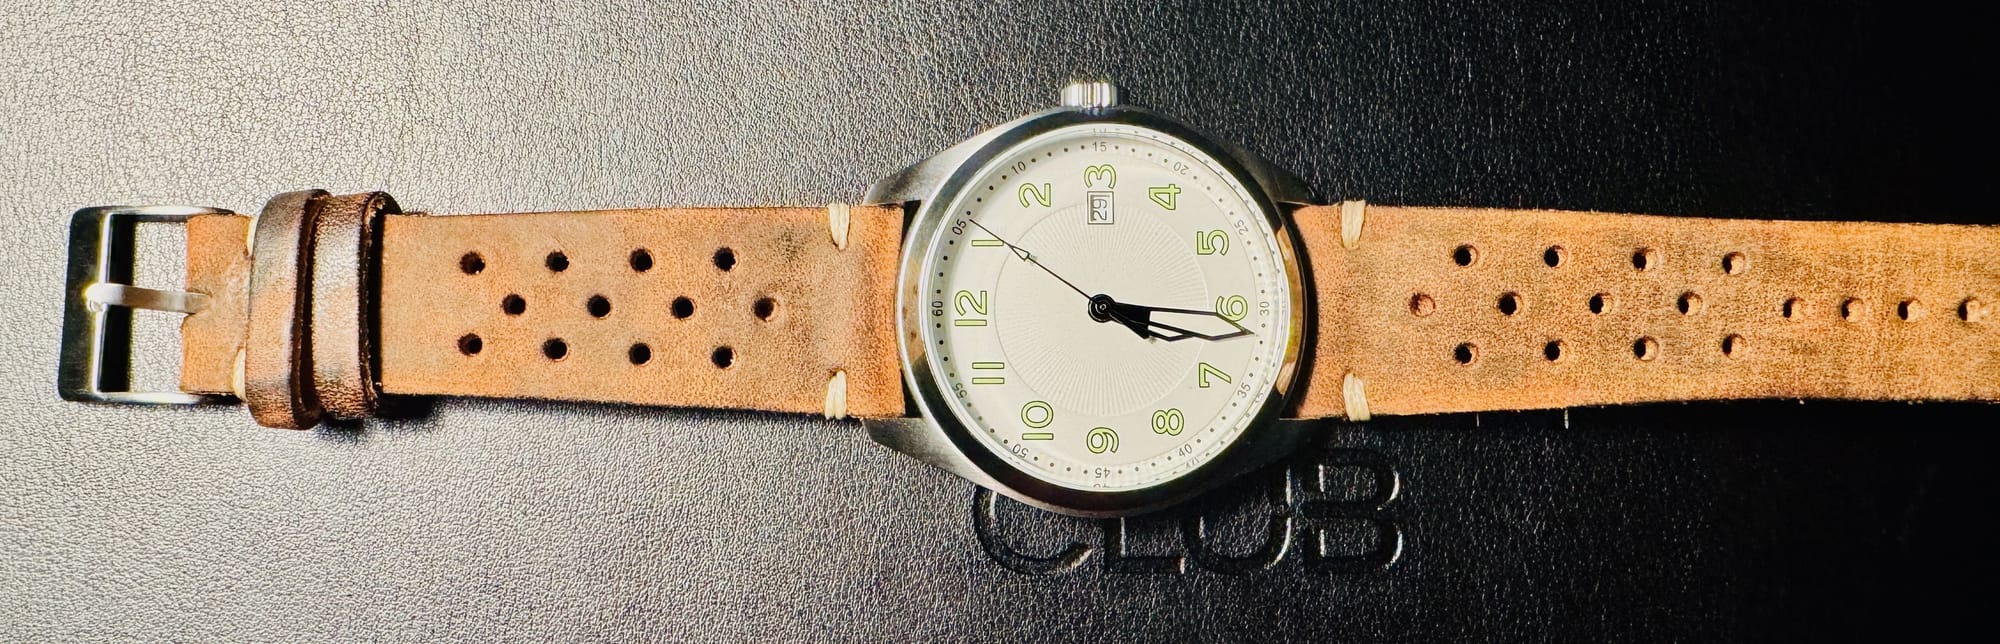
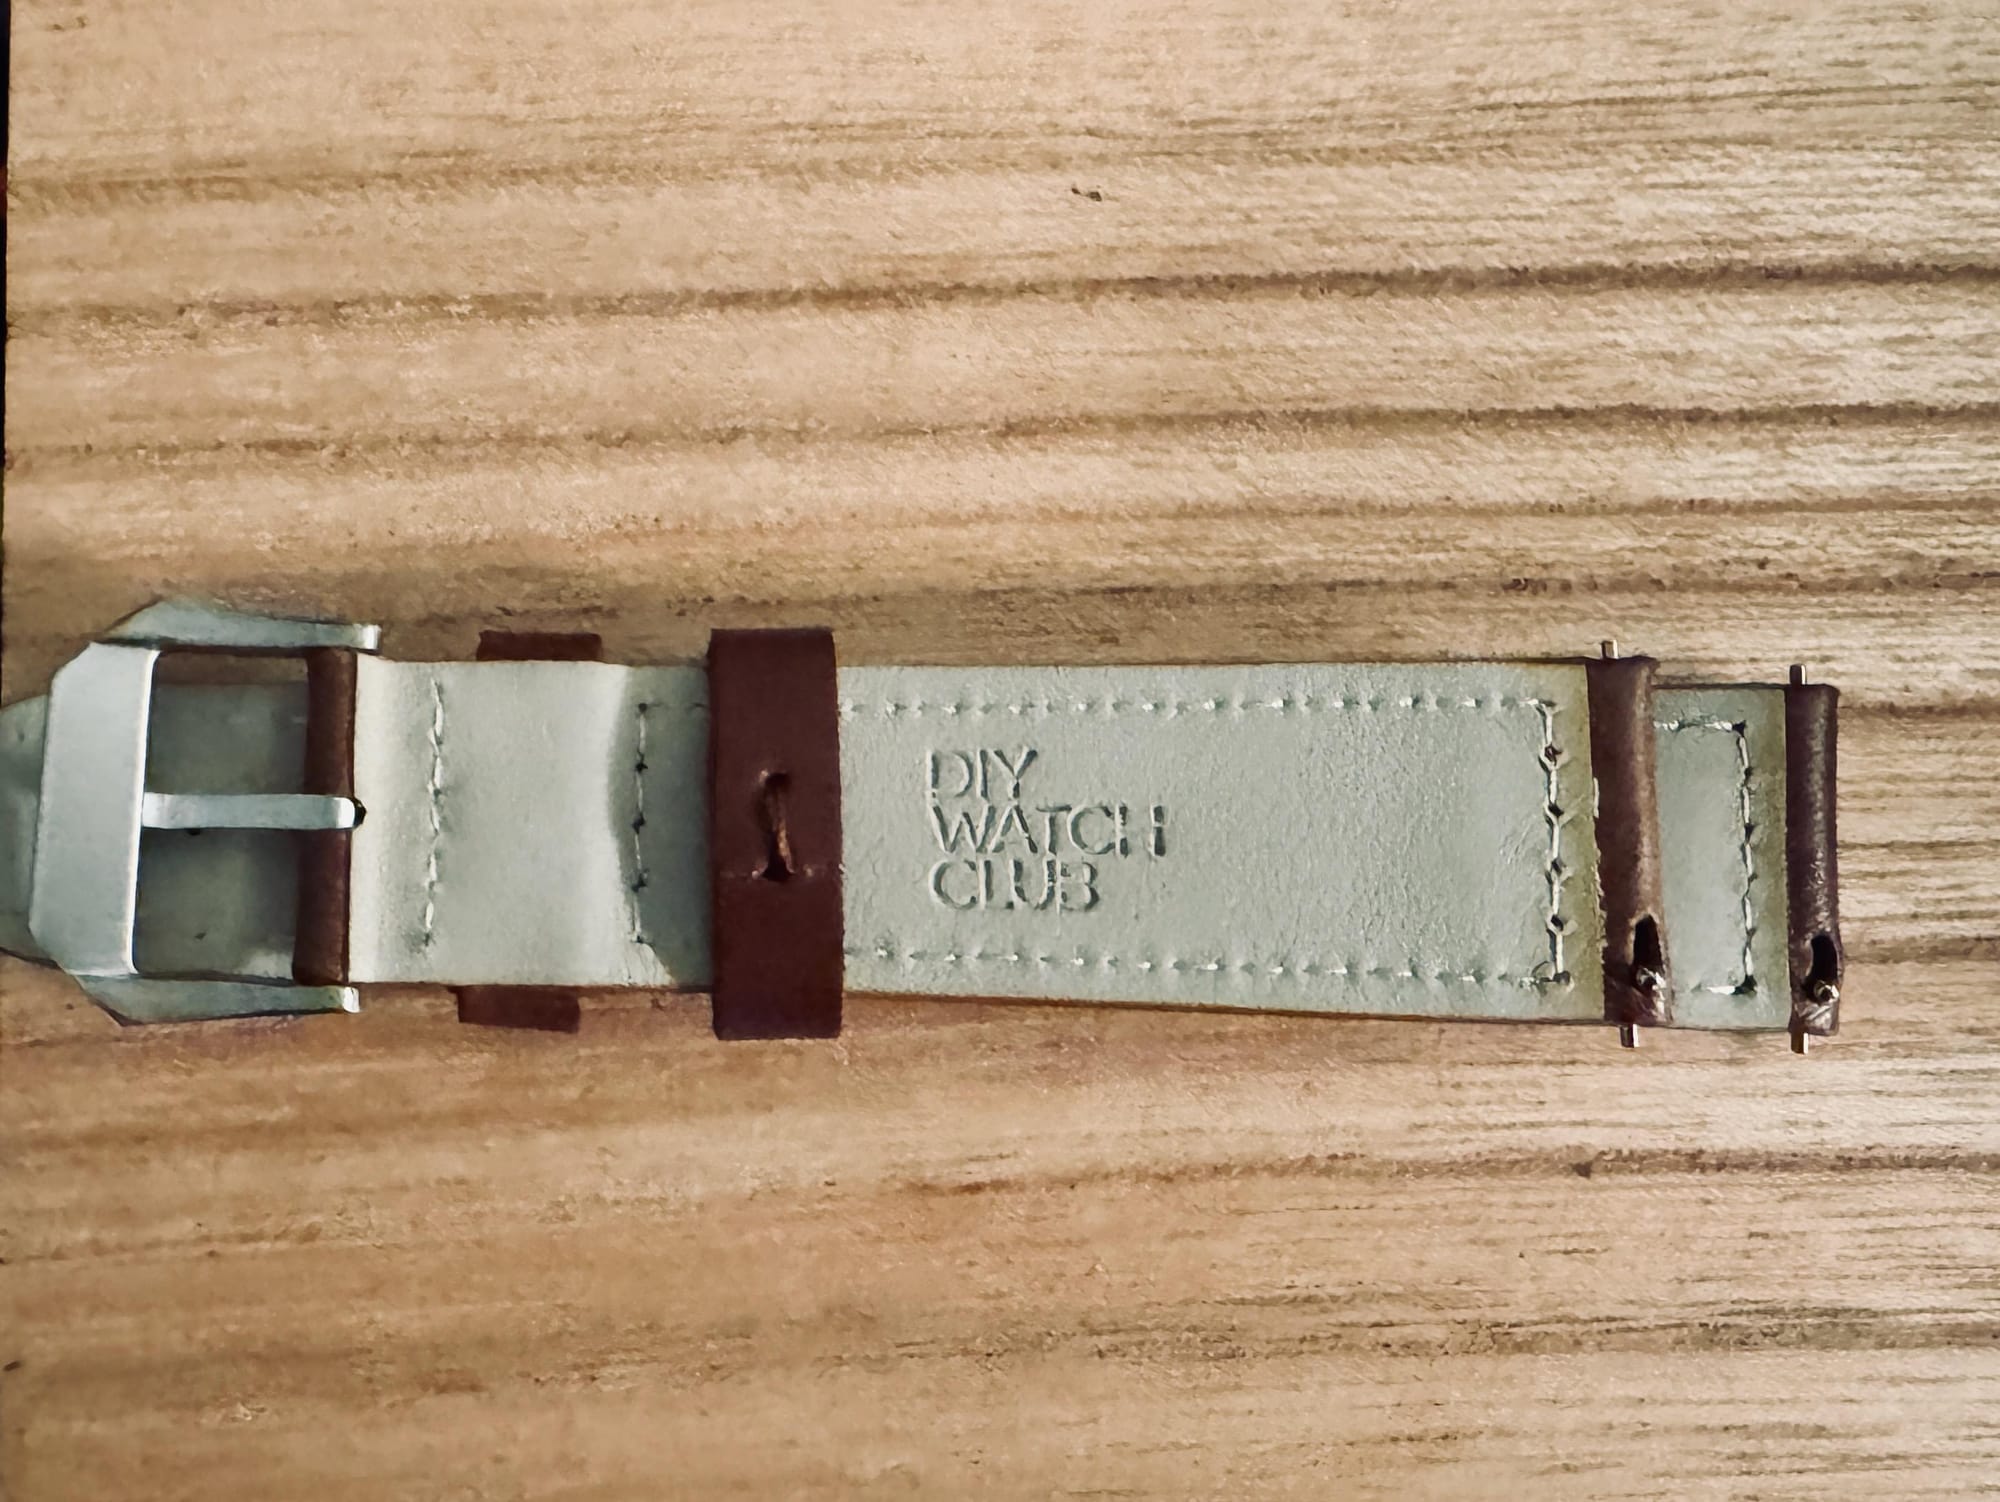
For leather bands, there are a lot of options. I've come to enjoy the racing (or rally) style.
You'll also see quick-release bands. With these, you don't need the spring bars; they come with integrated spring bars.
These are nice for quickly being able to switch out bands; carmel or natural leather or canvas for everyday wear, dark brown or black leather for formal wear. Takes about a minute to swap them out.
I do have a soft spot for NATO bands too. They're designed to retain the watch even if a spring bar pops, but I like the wear of a quality NATO band.
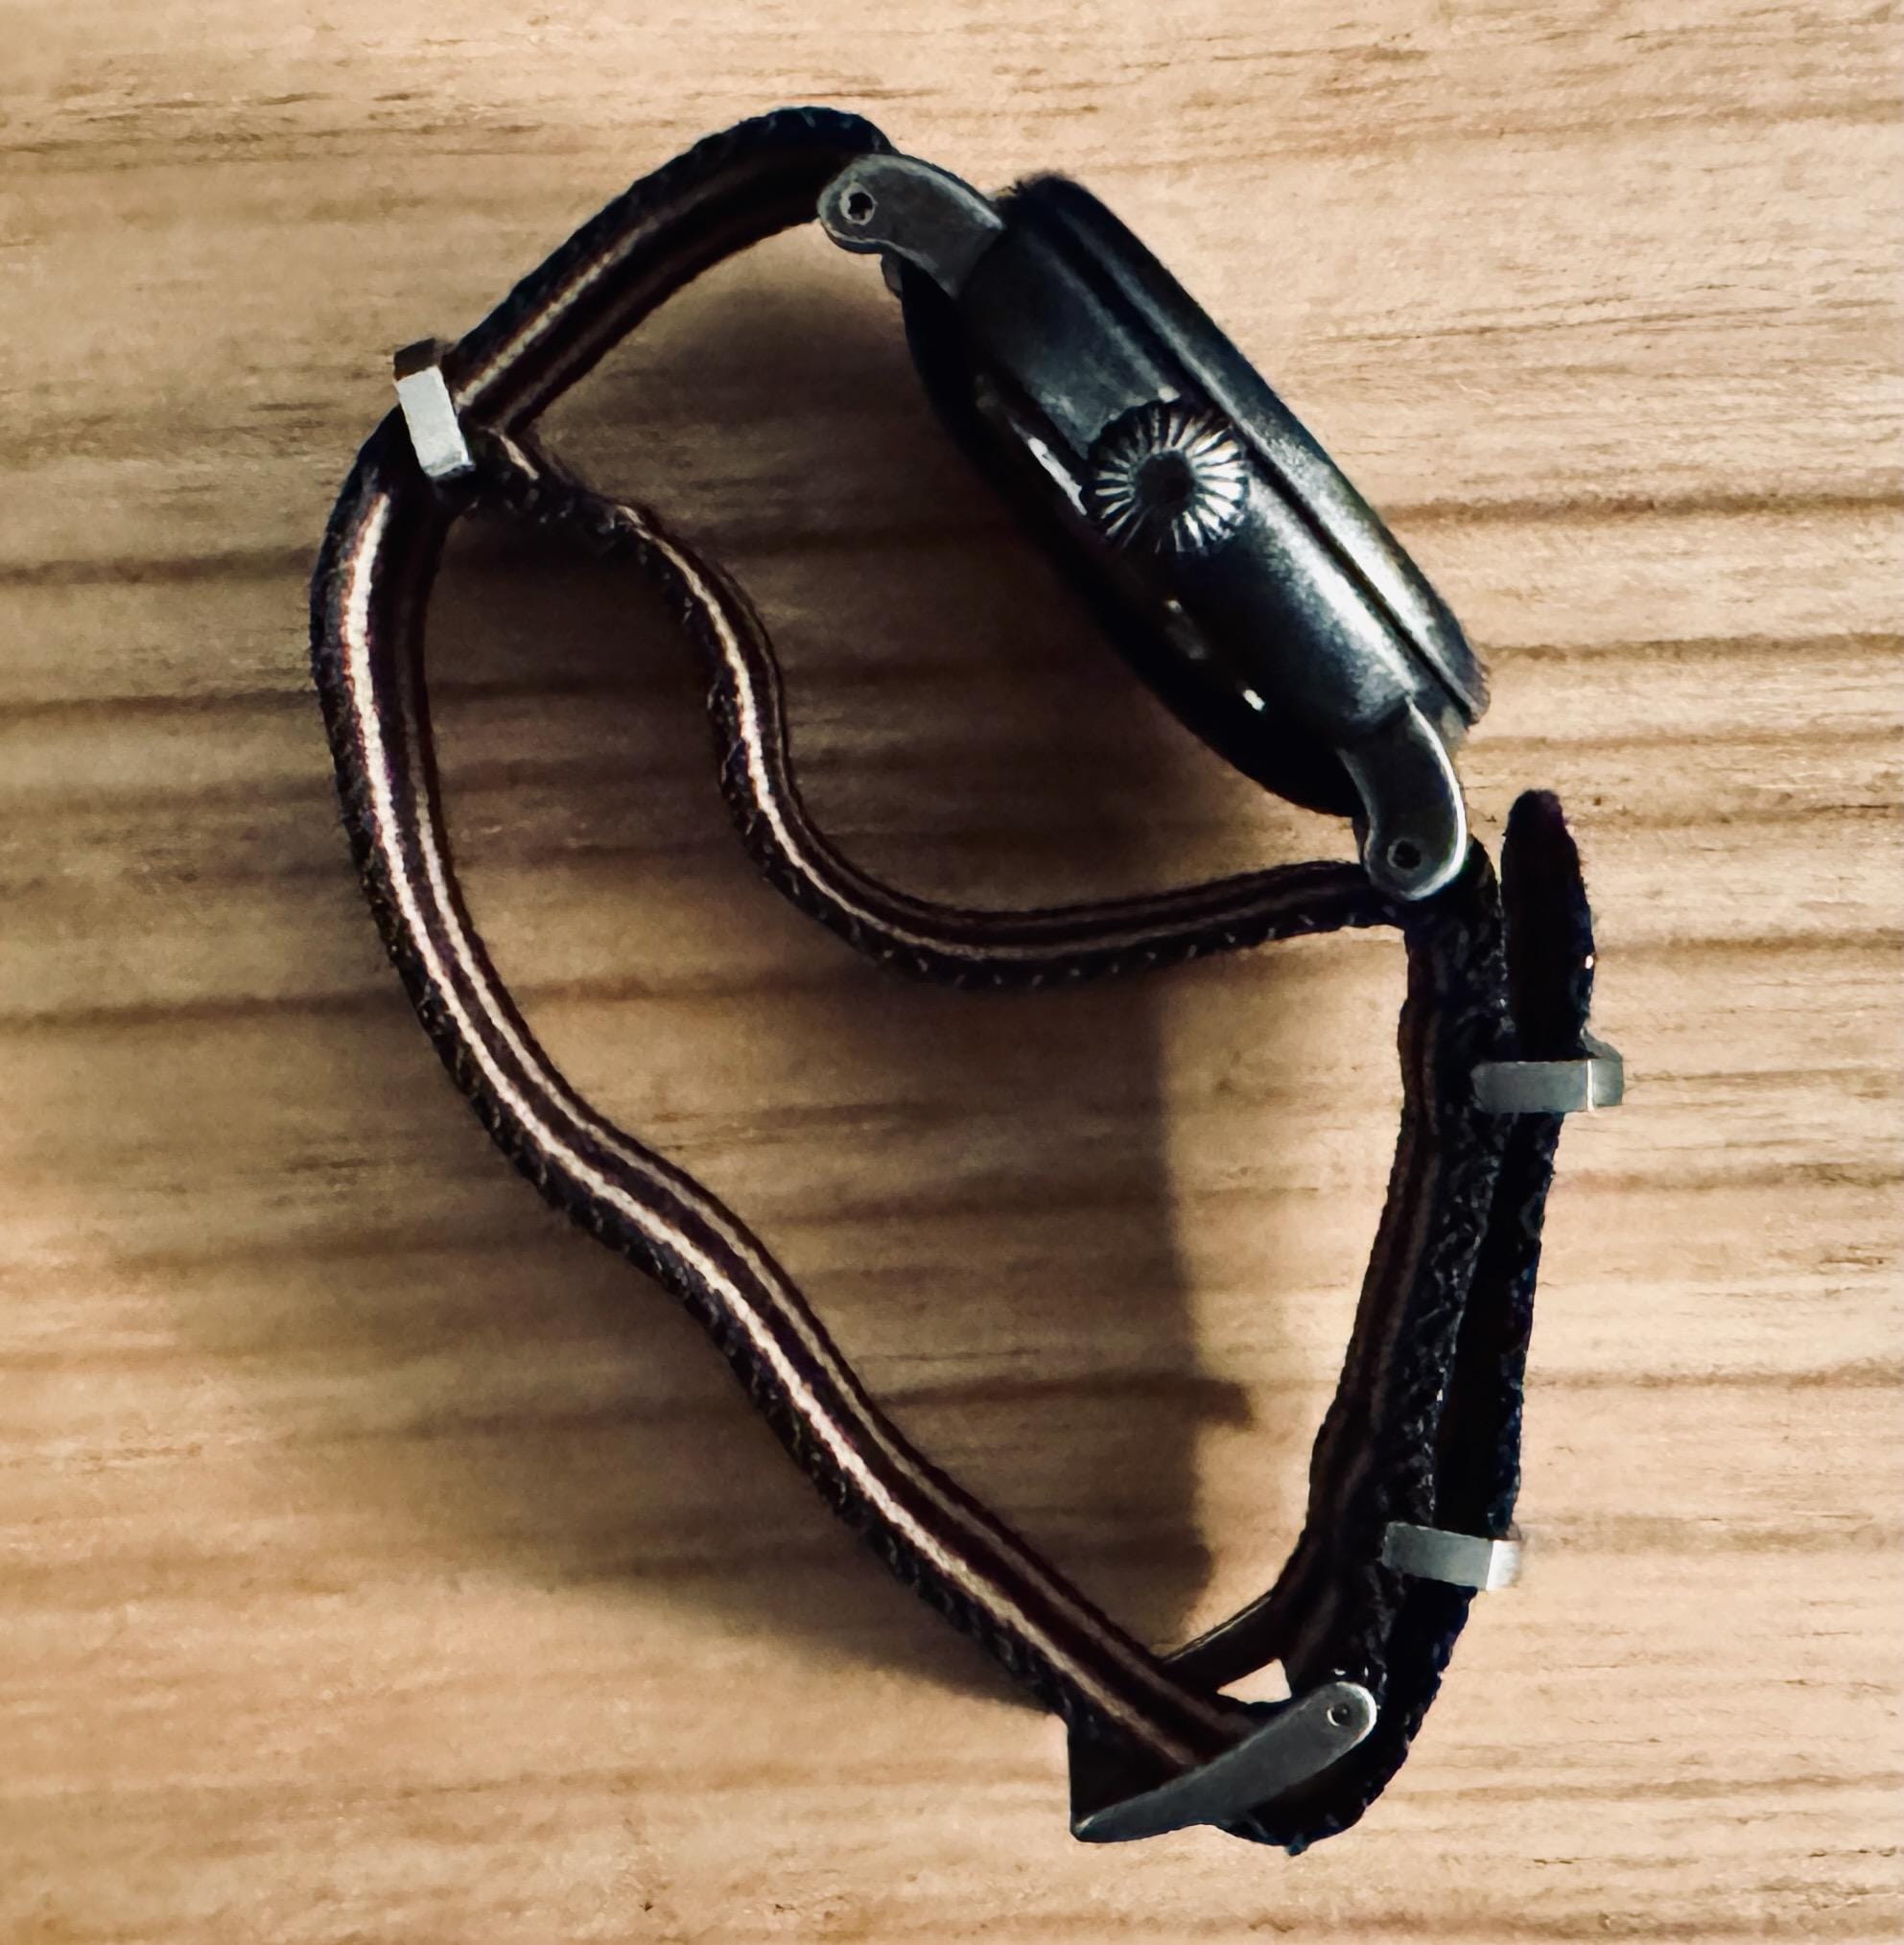

The NATO band, expanded and on my wrist.
Some final thoughts
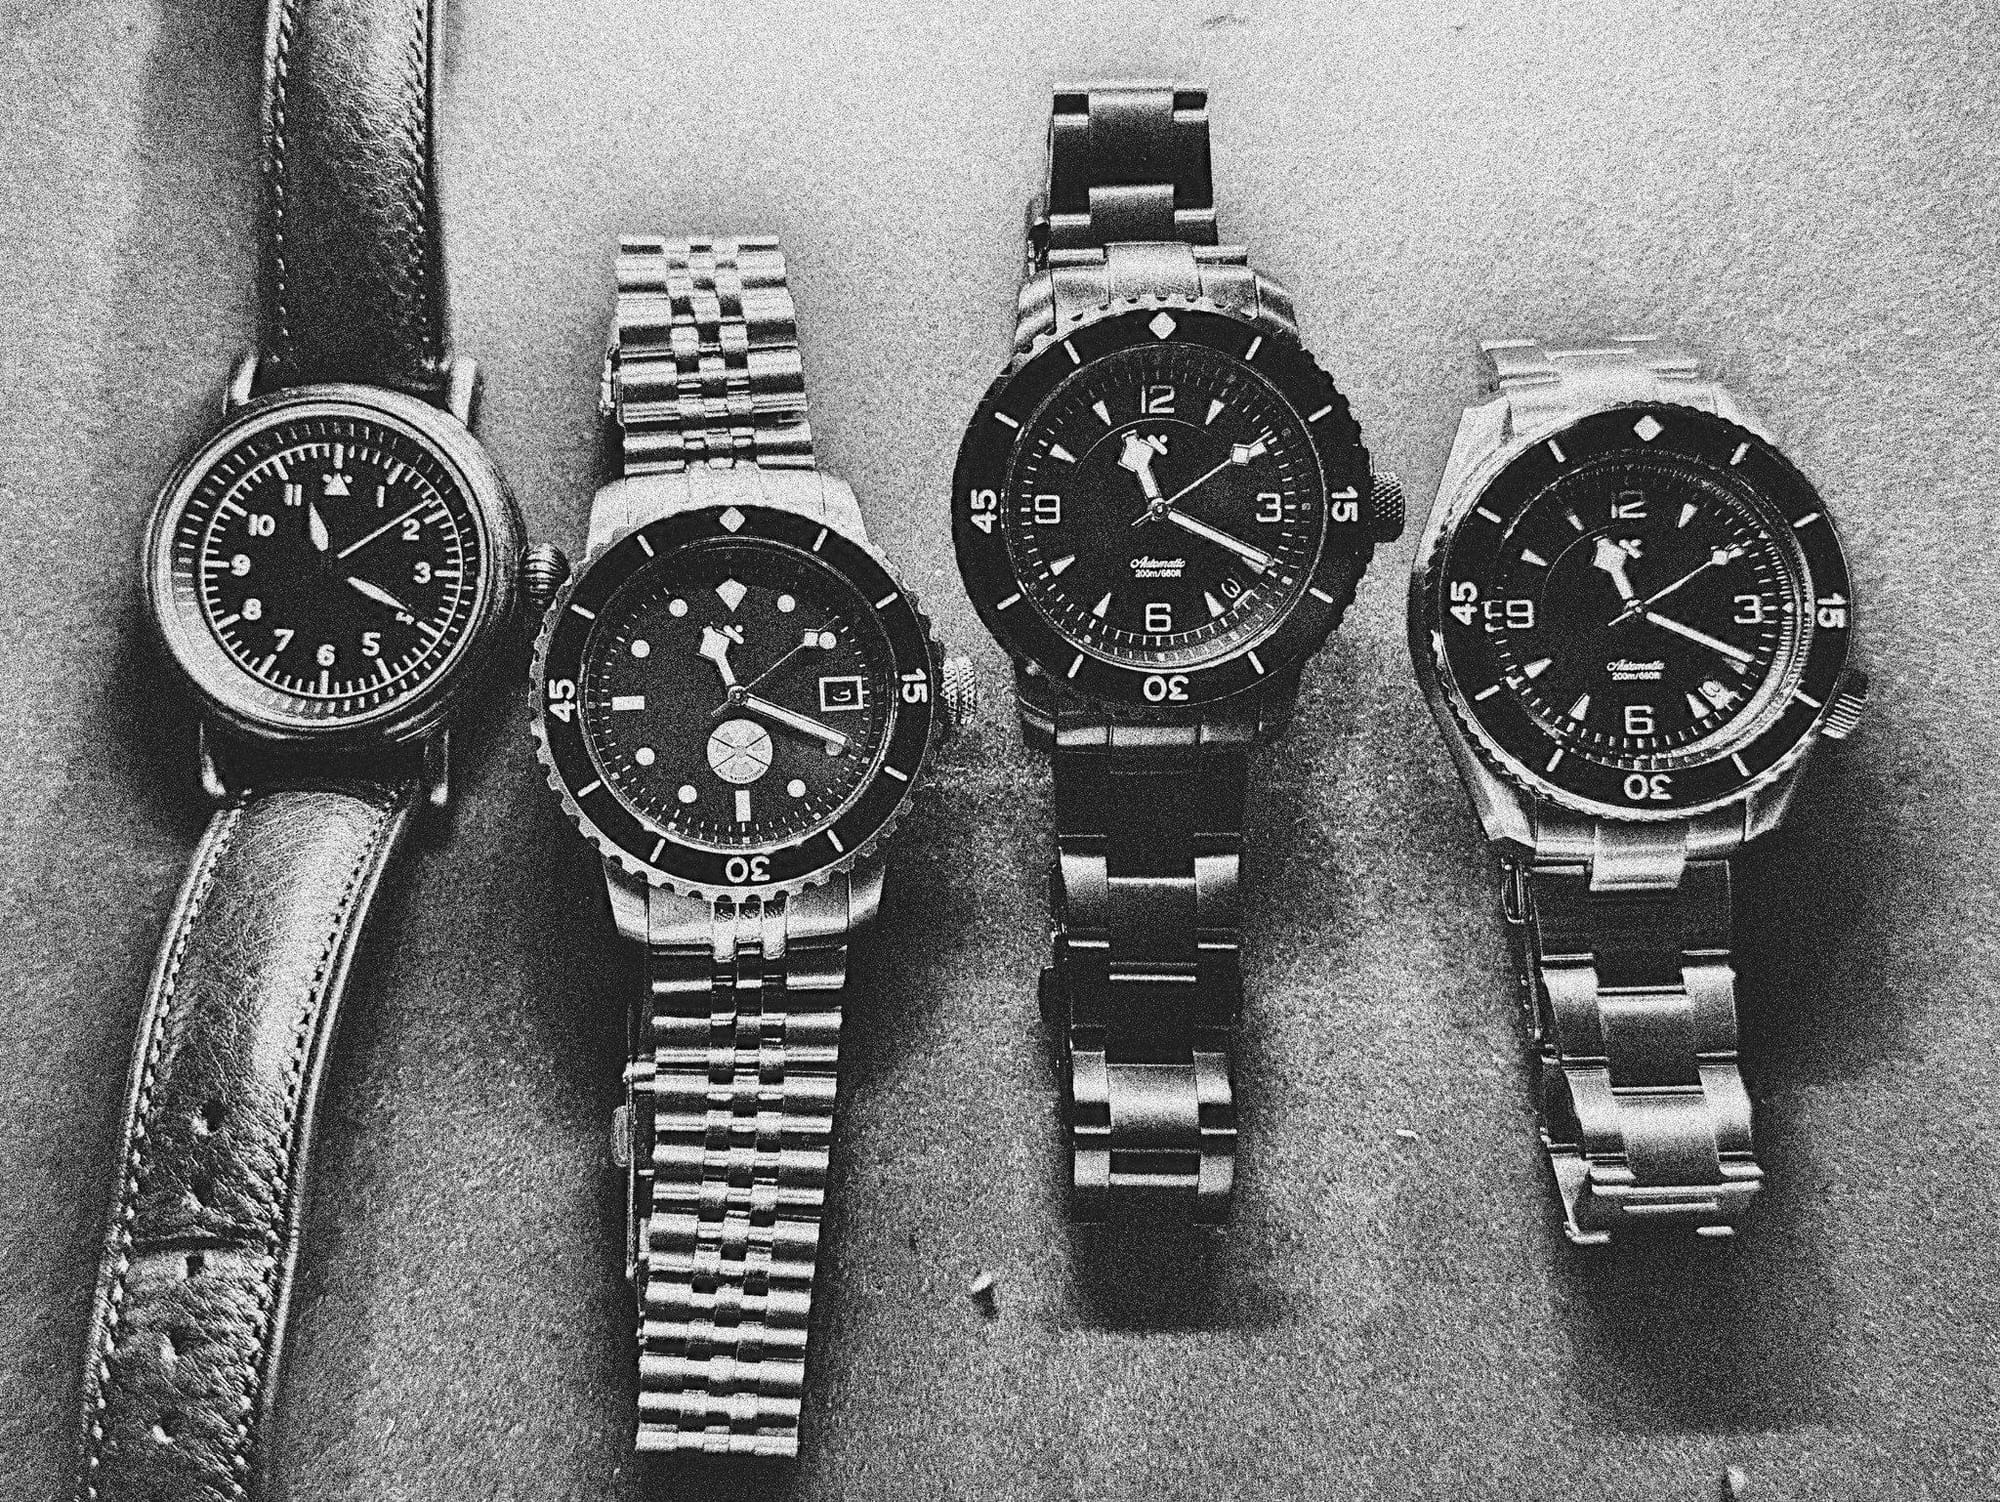


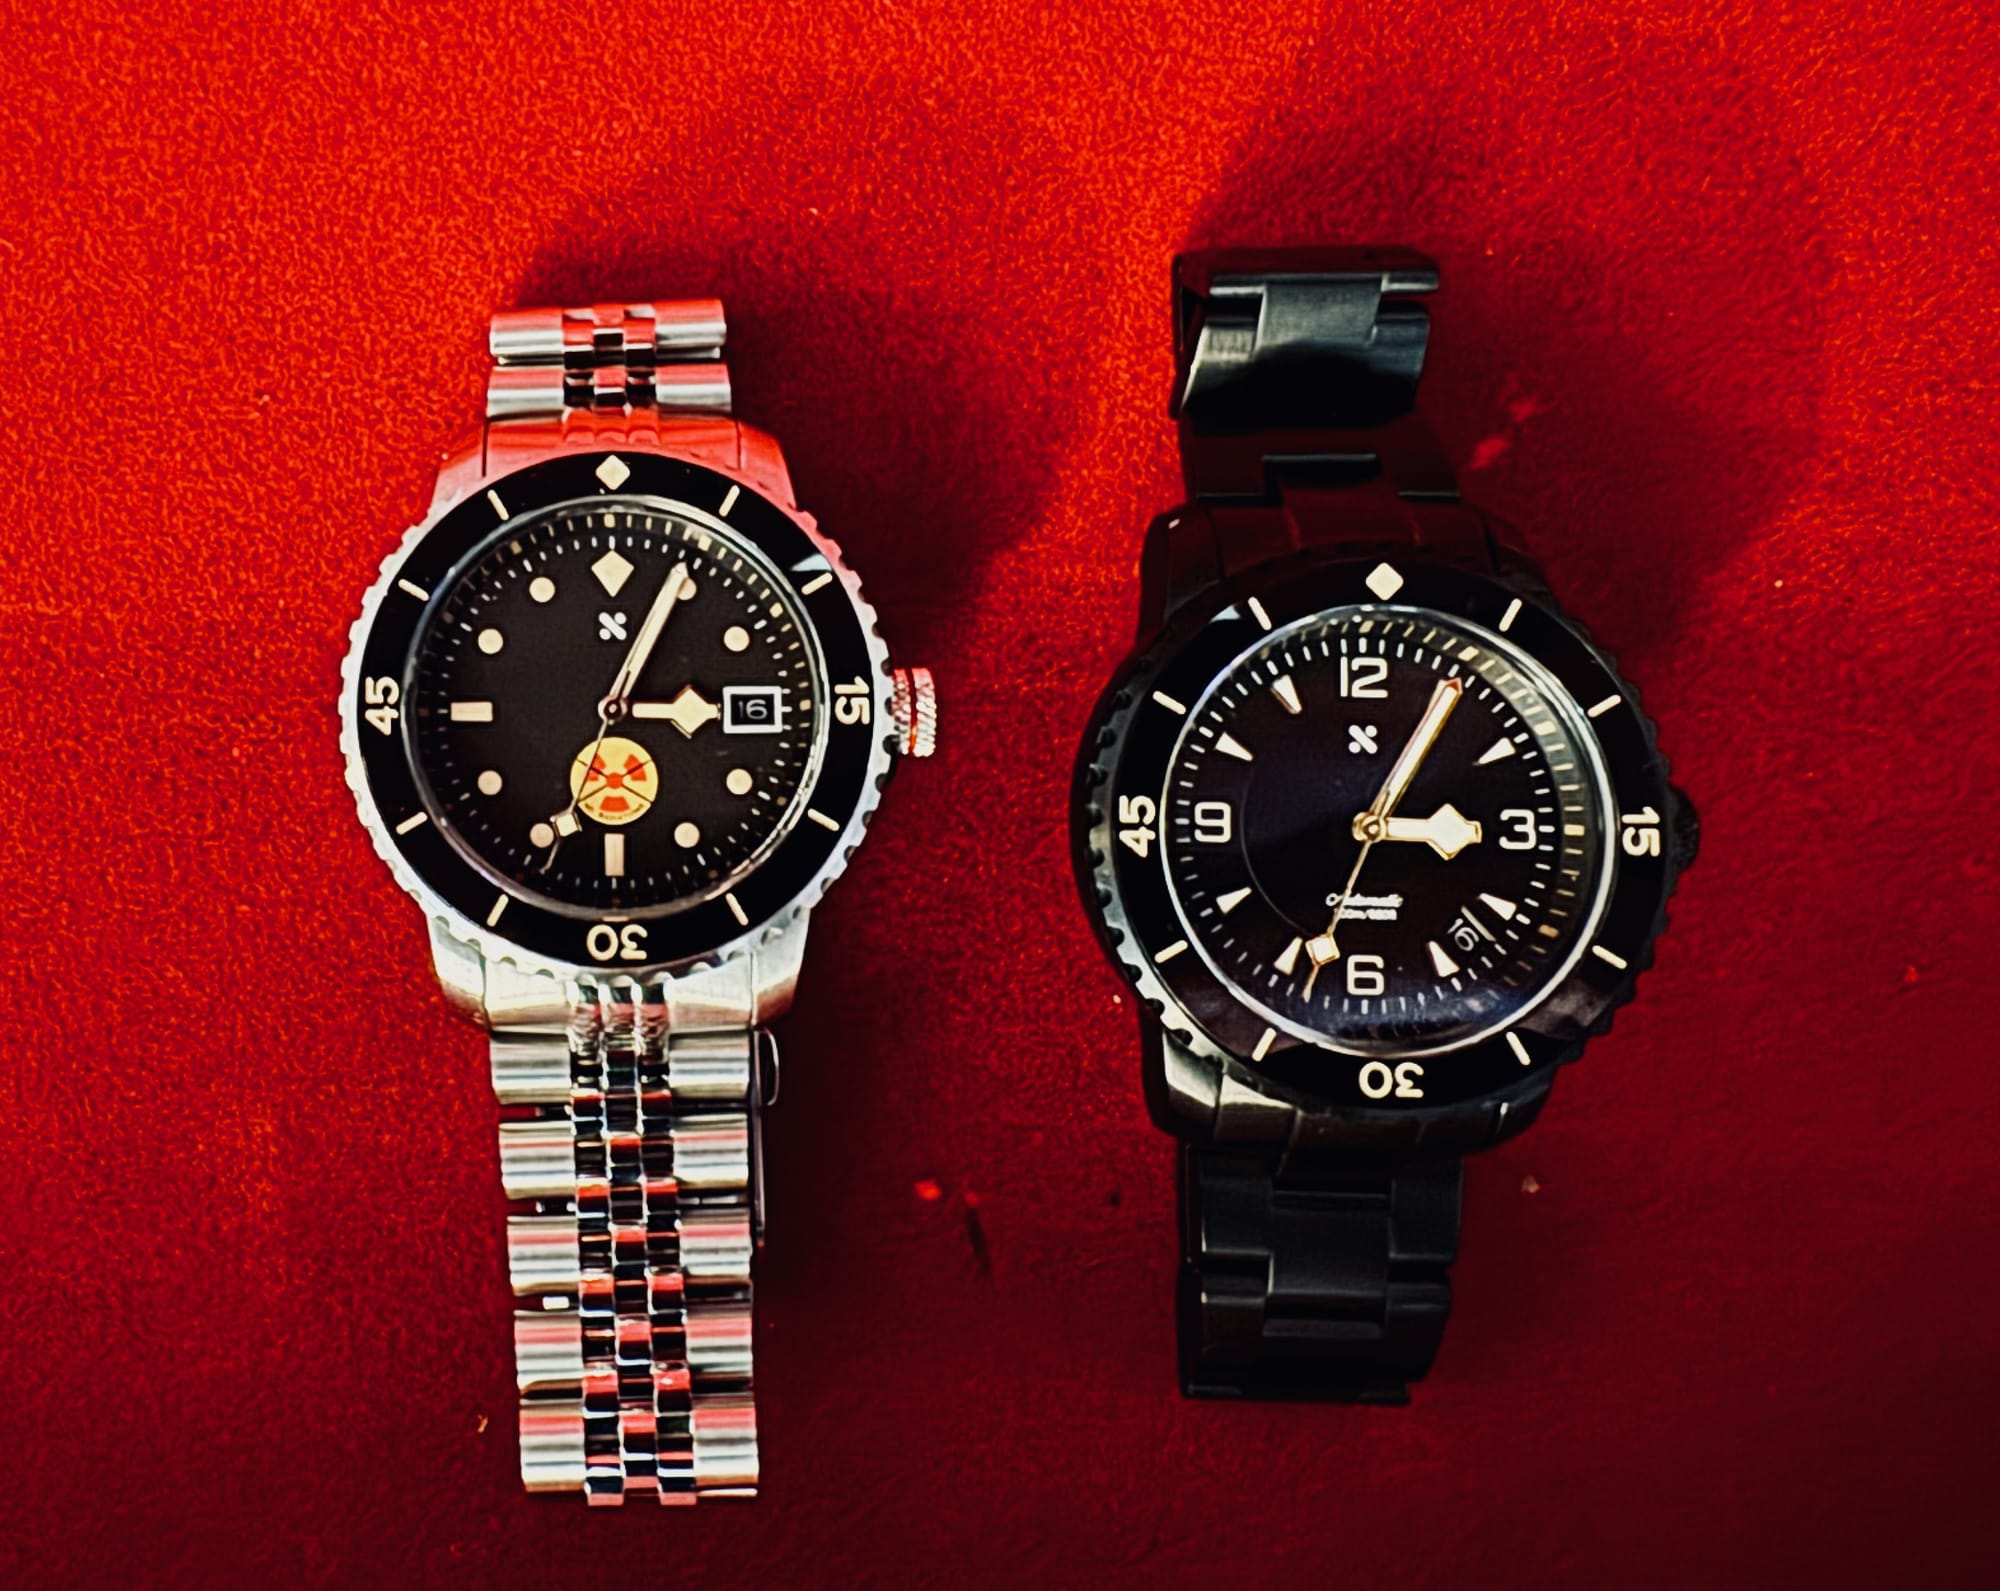
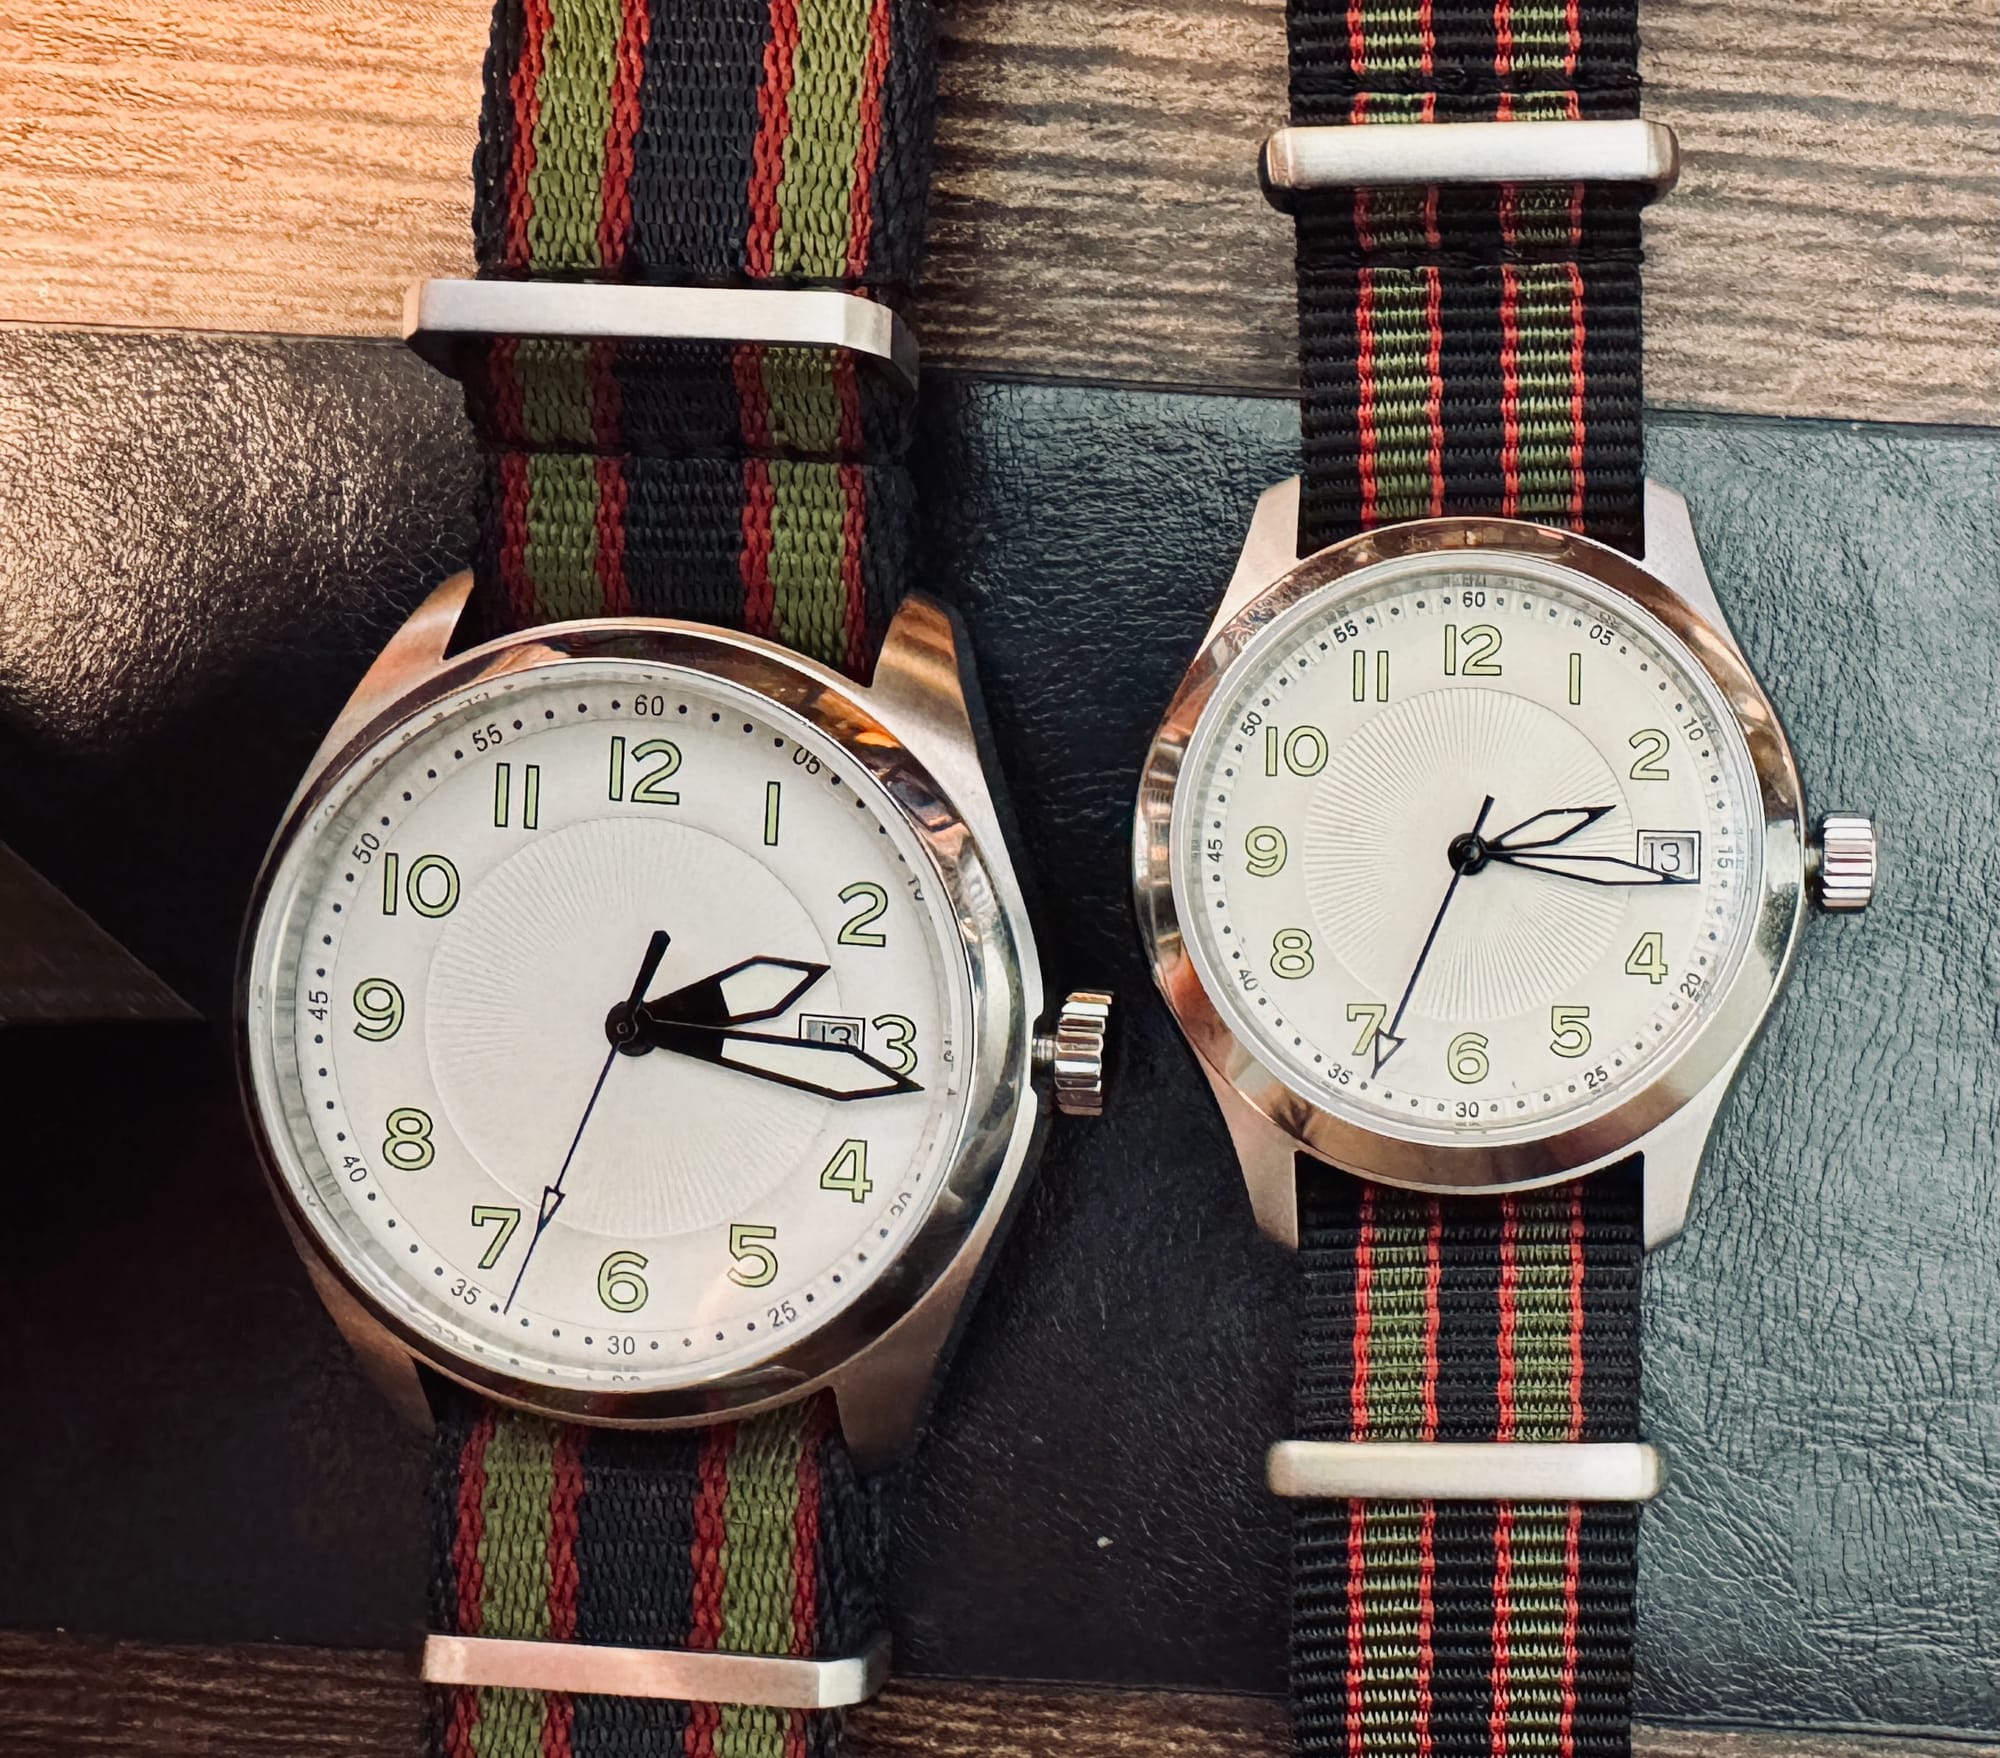
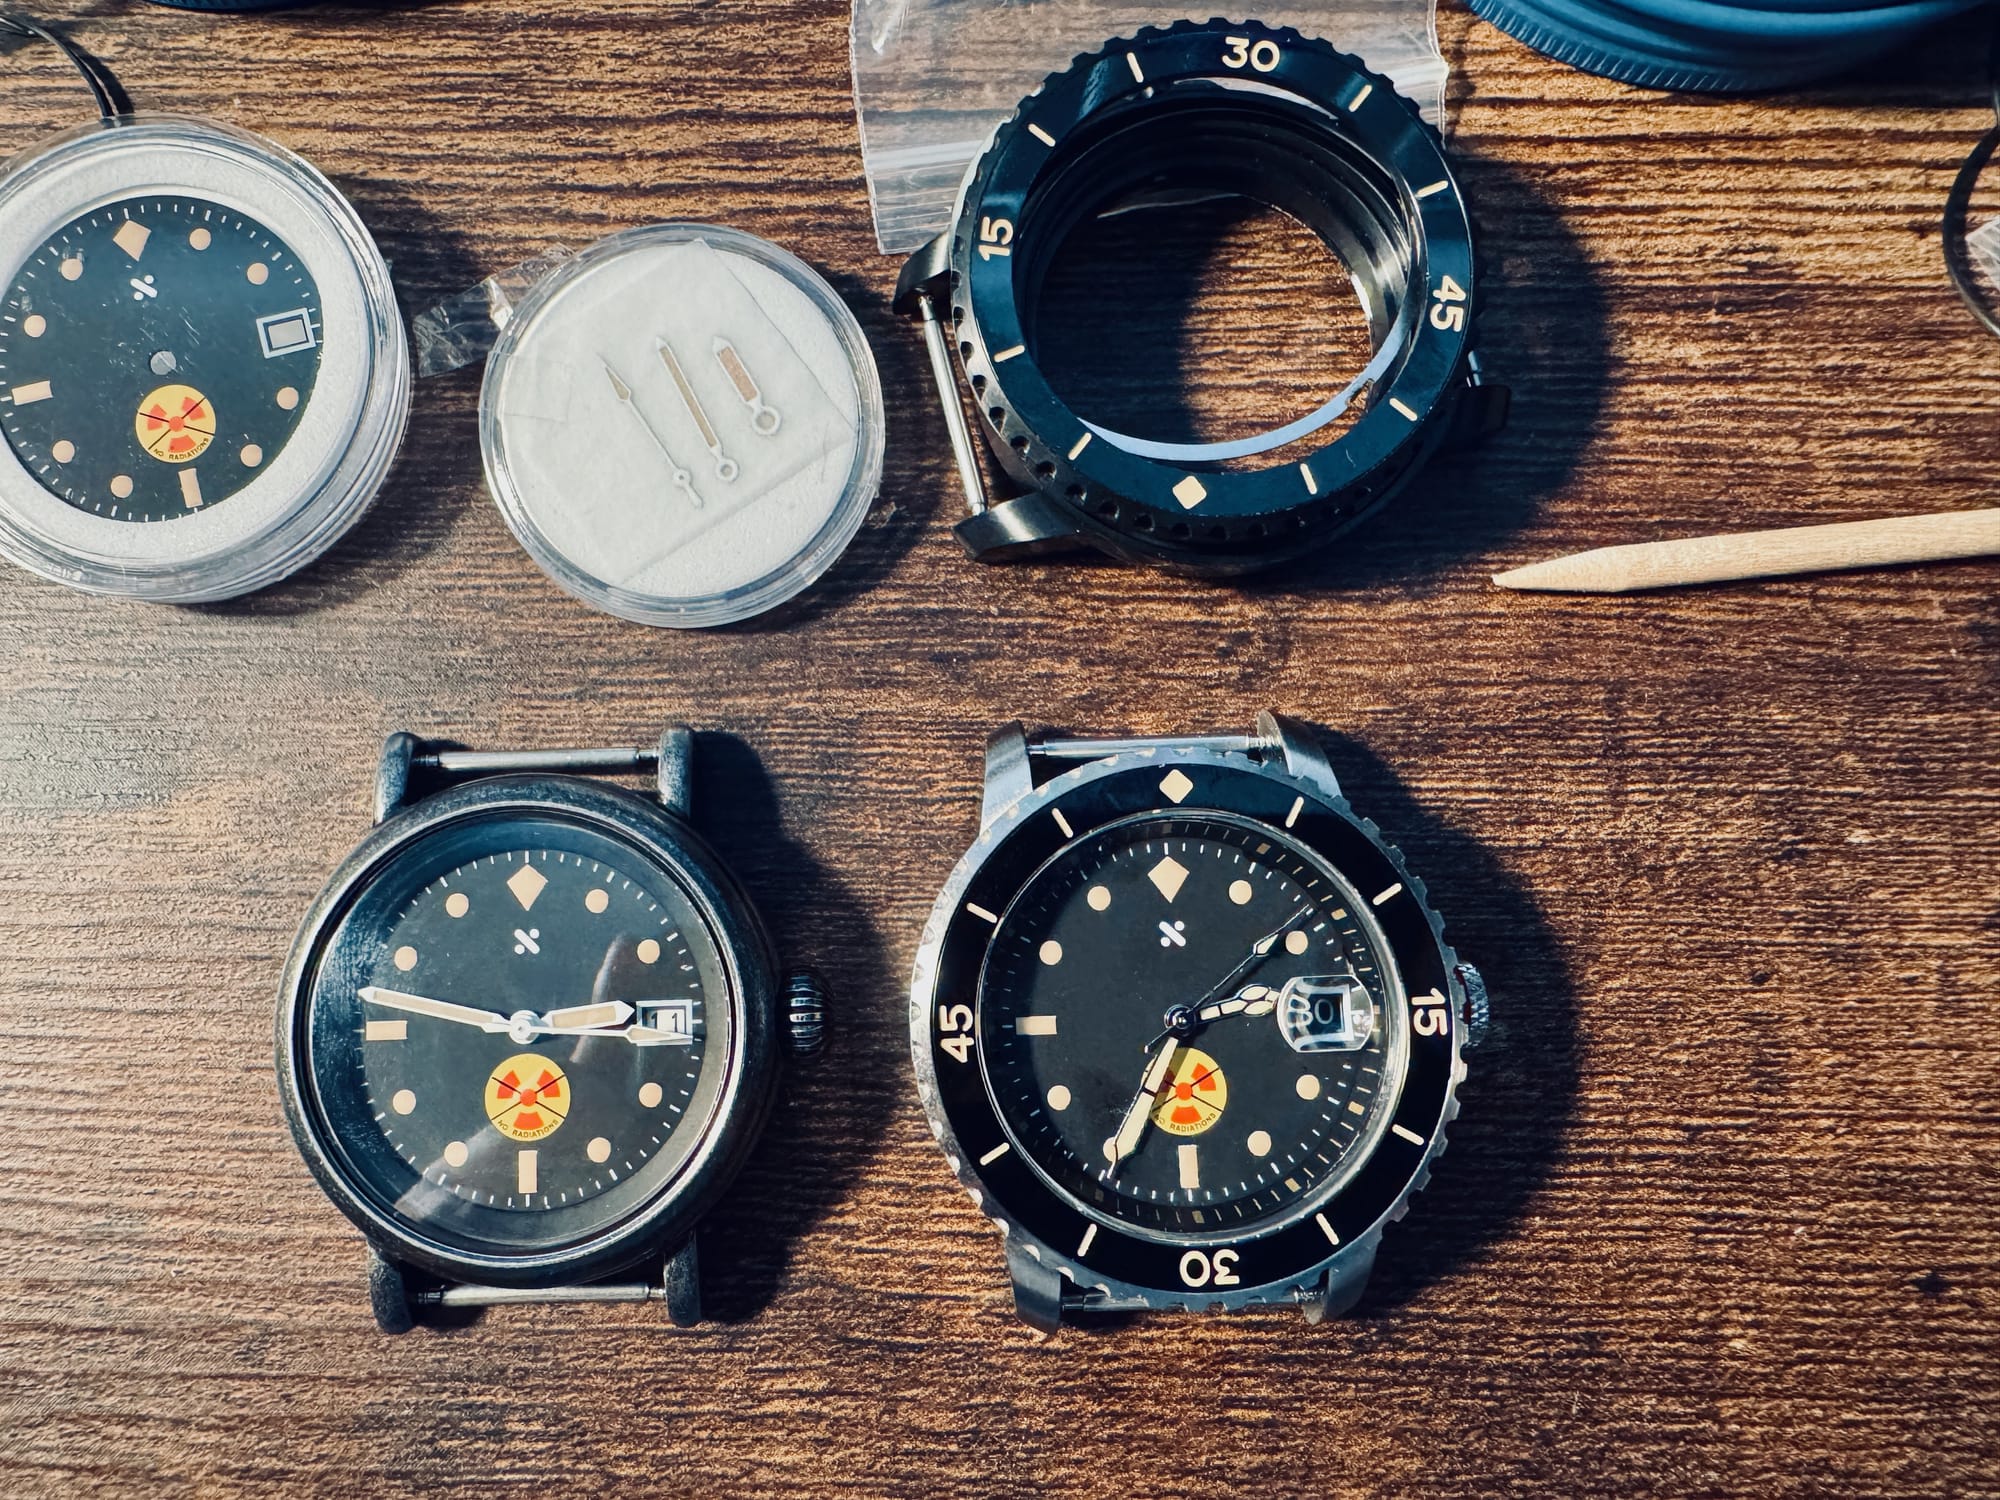
The watches I've built that I've kept. Four Seikos, two Swiss field watches.
One of the reasons I'm keen to turn this into a business is that I thoroughly enjoy assembling watches, but I only need so many of them. I've given away a few, I need to figure how to actually sell them.
My passion here remains building tool watches for my kind of people. I'd like them to get heritage watches that can be handed down, and I'll figure out how to make it affordable for them.